
Git Workflow
Normally, when working with a version control software, you want to work on small discrete chunks of code. After each feature or chunk is complete, you submit that to the version control software as a commit.
Simply stated, the workflow is:
- Work on one aspect of your project
- Stage and then commit the changes
- Work on another aspect of your project
- Stage and then commit the changes
- Push the changes to your GitHub repo
We’ll walk through that process by adding a helpful file, called a README file that is used to explain what the repo is all about.
The README file
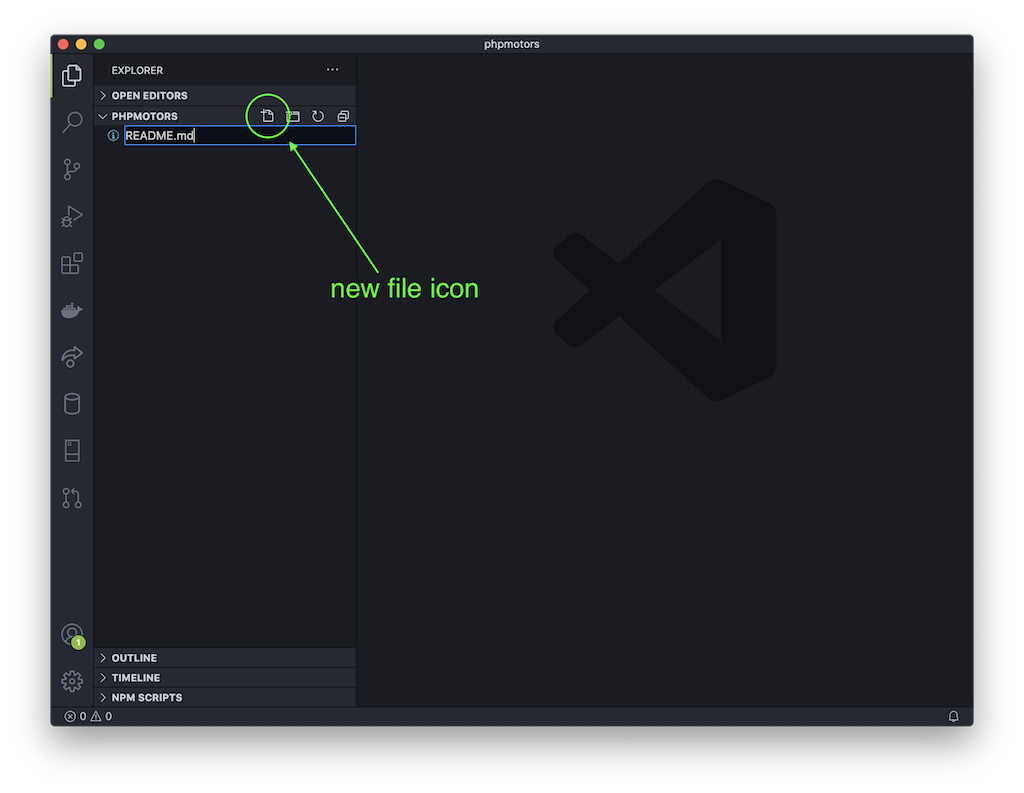
Back in VS Code, make a new file by clicking on the new file icon, or go to the File menu and click New File. Name the file README.md The .md is the file extension for Markdown files. GitHub will know what to do with it.
We’ll use Markdown in this file, which is like a distant cousin to HTML. It makes text readable as plain text, but still has some syntax that allows computers to alter the display of the text, just like HTML.
To learn more about the Markdown language, see here: https://guides.github.com/features/mastering-markdown/
In this new file type in some text to explain what this repository contains:
# My Awesome Project
This is the repository for my really cool project.

You can see the real thing here:
https://username.github.io/repository-name
Replace username.github.io with the domain name from your repository and repository-name with the name you gave your repository.
Save the file.
Now once you save the file, you should notice some things with the Git icon on the left side menu. The Git icon now has a number, signifying that it now recognizes that one file has been changed.
![]()
If you click on the Git icon, a sidebar opens to display Git info. In this panel, you can stage the changes for a commit, add a message, commit the changes, and even push them to the GitHub repo.
![]()
Note: If you discard the changes (the revert icon), then all the changes you made to the file will be lost and the file will revert back to how it was before you made any changes. This is permanent and there is no way to get the changes back.
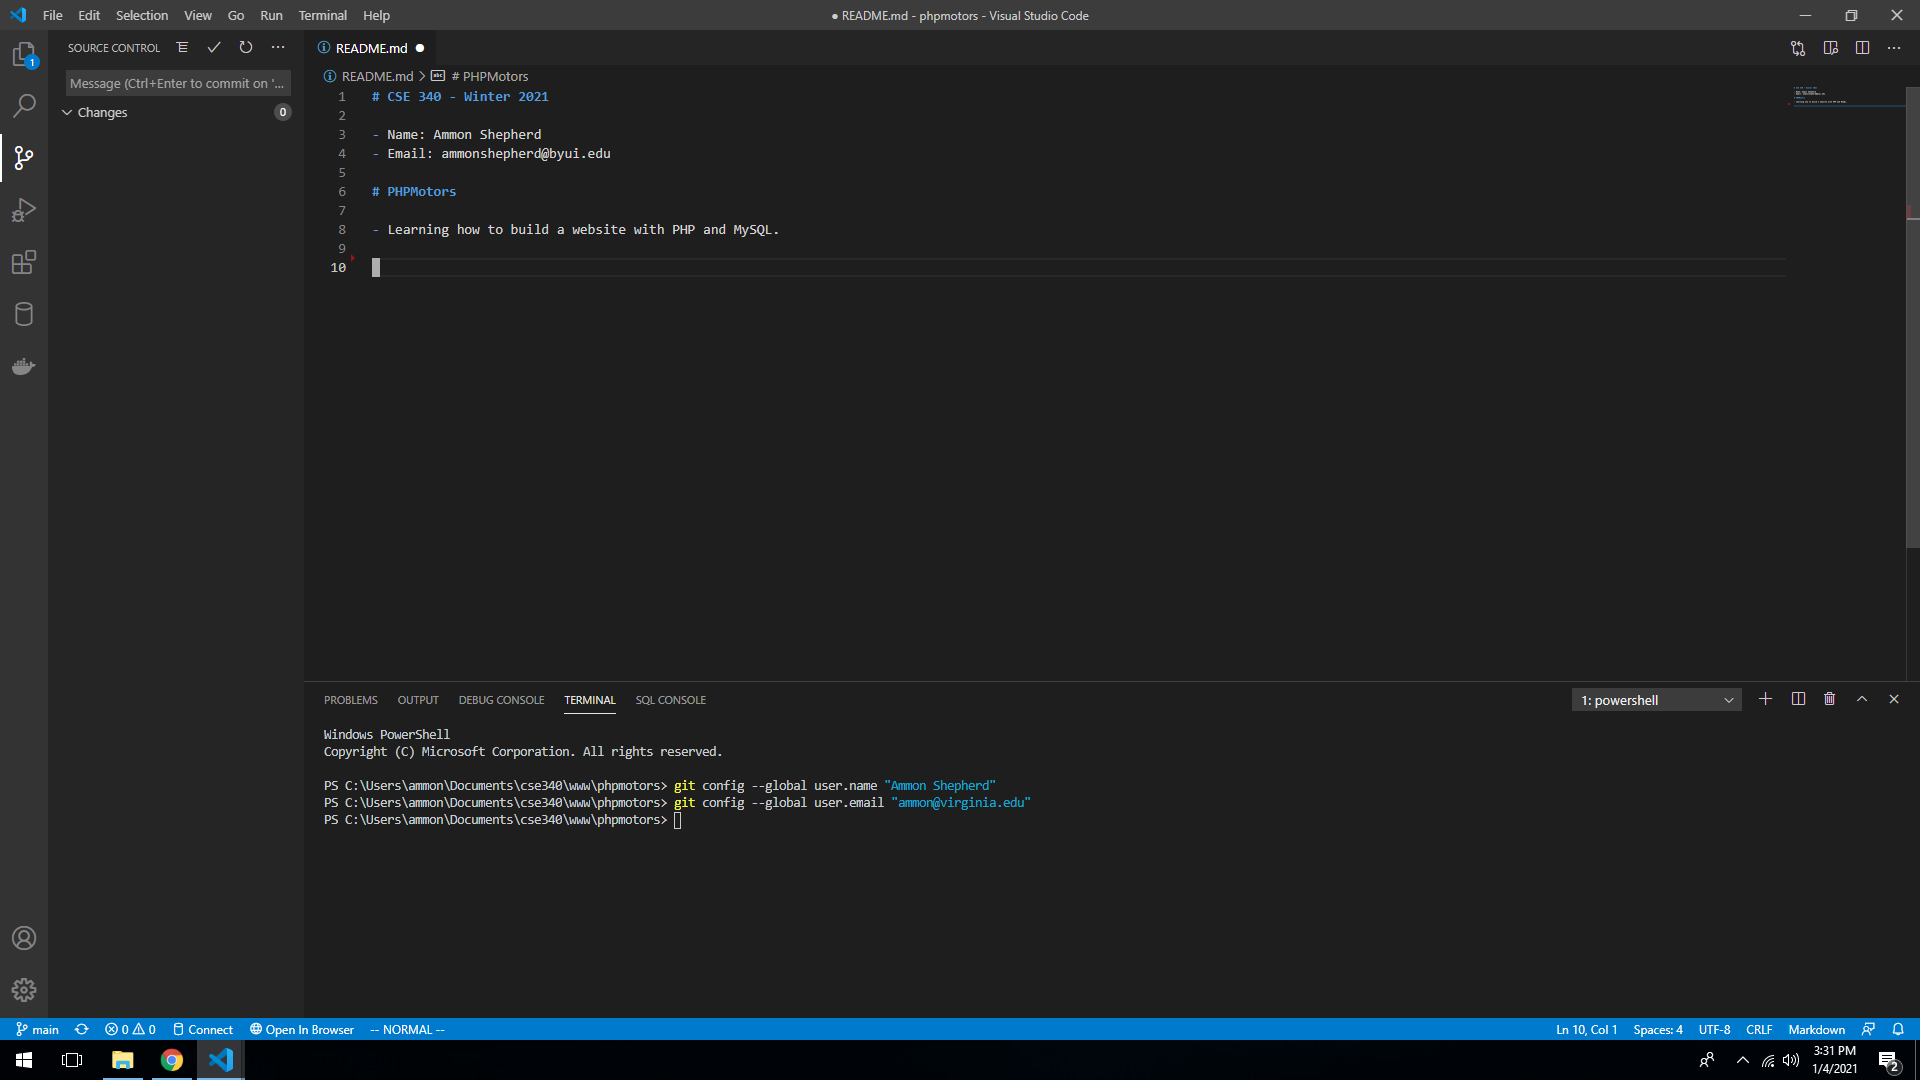
Before we can make a Git commit, Git needs a name and email to associate with the commit. This will set the name and email in Gits global settings, so you only need to do this once. To do this, open the Terminal in VS Code (Terminal->New Terminal or View->Appearance->Show Panel).
Type in the following command (but use your name) and hit Enter on the keyboard
git config --global user.name "FIRSTNAME LASTNAME"
Type in the following command (but use your email address) and hit Enter on the keyboard
git config --global user.email "youremail@email.com"
Stage the changes for a commit by pressing the plus icon next to the file name.
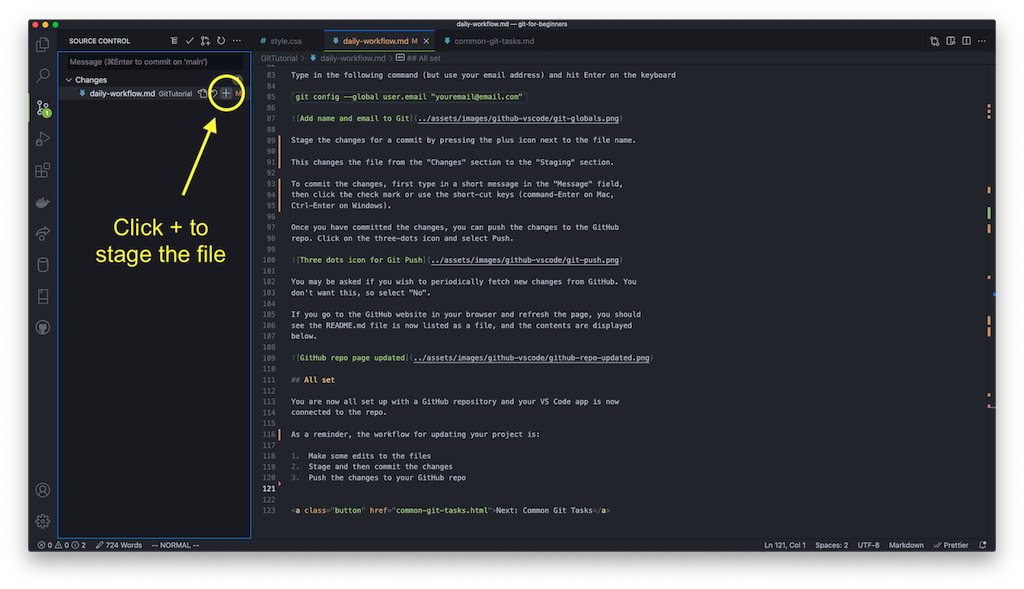
This changes the file from the “Changes” section to the “Staging” section.
To commit the changes, first type in a short message in the “Message” field, then click the check mark or use the short-cut keys (command-Enter on Mac, Ctrl-Enter on Windows).

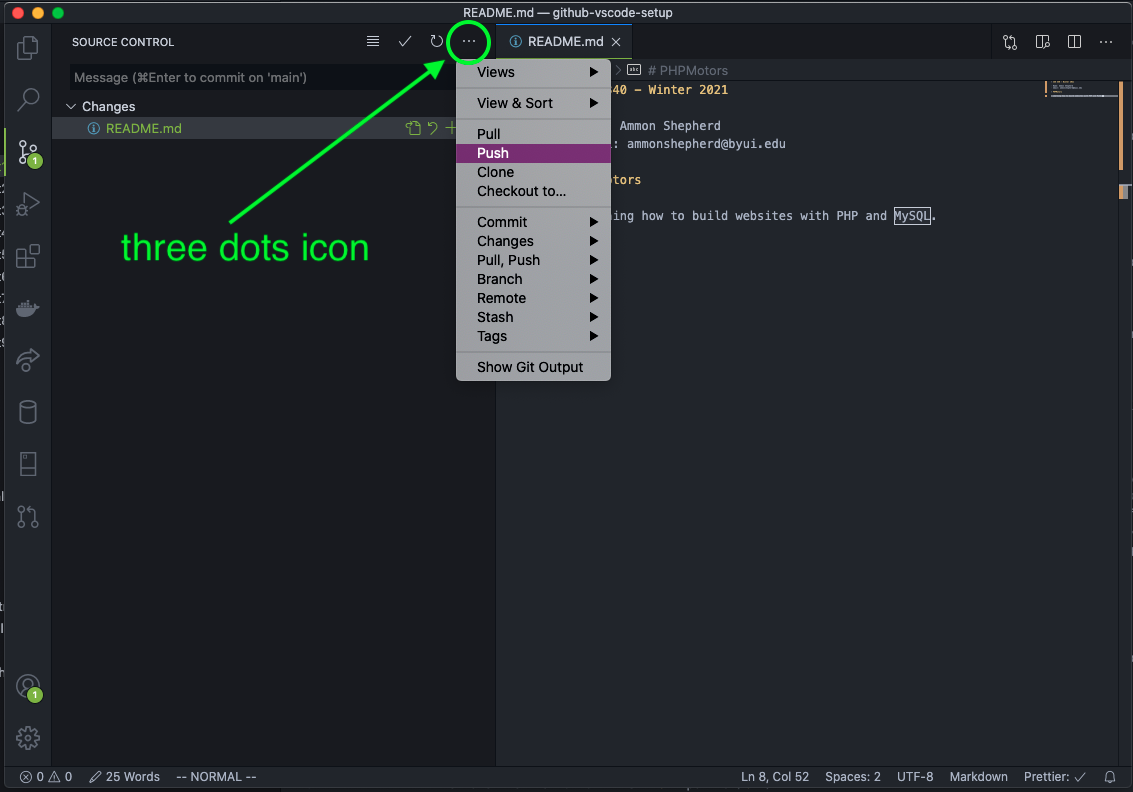
Once you have committed the changes, you can push the changes to the GitHub repo. Click on the three-dots icon and select Push.
You may be asked if you wish to periodically fetch new changes from GitHub. You don’t want this, so select “No”.
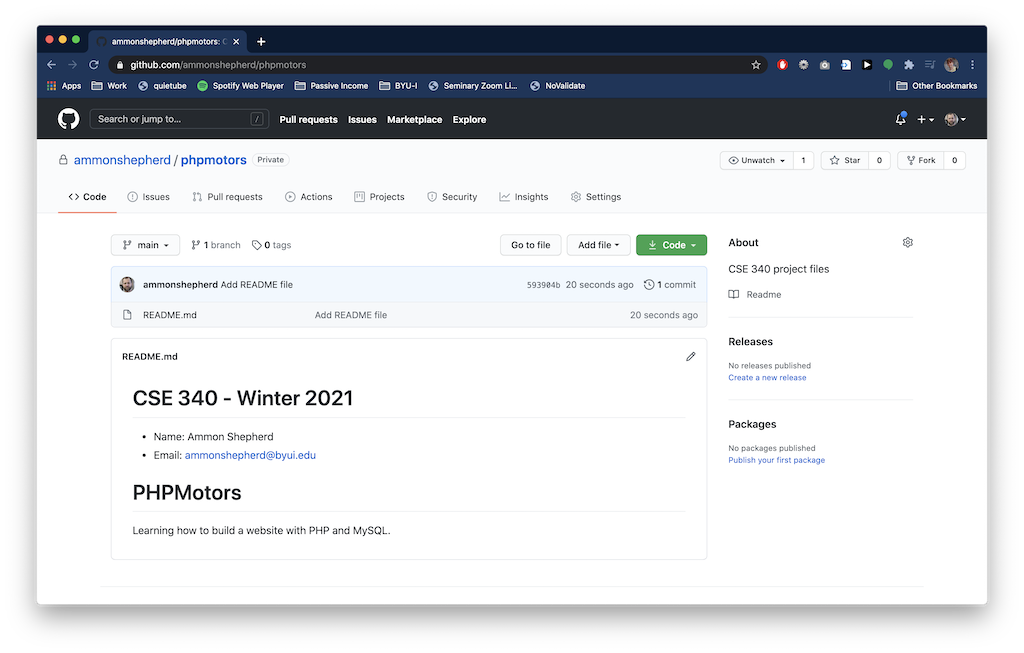
If you go to the GitHub website in your browser and refresh the page, you should see the README.md file is now listed as a file, and the contents are displayed below.
All set
You are now all set up with a GitHub repository and your VS Code app is now connected to the repo.
As a reminder, the workflow for updating your project is:
- Make some edits to the files
- Stage and then commit the changes
- Push the changes to your GitHub repo
Make a website
You can now use this set up and your knowledge of Git to make and host your own website using GitHub.
Follow this tutorial: Make a website
You can skip the first step (1. Software) and the first part of the second step (2. GitHub), since this tutorial is the same thing!