Part 2

Git Programs
Now that you have learned the why of Git, you can learn the how. Git was originally created as a command line program, and is generally used in this way. There are many other programs that interface with Git and provide a graphical interface. There’s no right or wrong way to use Git and no right or wrong application to use with Git. It’s simply a tool that you can use to solve a problem any way you want. This next section will show you how to use a popular text editor to create files and use Git along with a popular code sharing website, GitHub.com.
Installing Git
The steps and URLs for installing Git will change over time. For that reason, this section will not give exact steps for installing Git. Instead, the best option is to browse to the official Git website, http://git-scm.com/ (at time of writing) and find the section for downloading and installing Git for your operating system. Alternatively, do a web or video search for installing Git on your operating system.
Git is not the only distributed version control software out there. Others include BitKeeper (the inspiration for Git), Mercurial, Bazaar, Fossil, and Apache Subversion.
Installing VS Code
Just as with Git, the steps for downloading and installing VS Code will change. Browse to the official VS Code website https://code.visualstudio.com/ and follow instructions there for downloading and installing VS Code for your operating system. Alternatively, do a web or video search for installing VS Code on your operating system.
There are a very great many applications that help you use Git. VS Code is by no means the only or the best. It is simply a tool that I find very useful and easy to use for working with Git and GitHub. Your mileage may vary, and feel free to adapt these instructions to your favorite code editor or graphical Git application.
Using GitHub.com
Using GitHub.com is not required. As a matter of fact, you don’t need to use any code sharing website at all. If you do want others to see your code and collaborate with you, then a service like GitHub.com or GitLab.com are great ways to do so. You can also create a repository on these services that is private; not publicly visible. You can give other GitHub.com accounts access to these private repositories to allow collaboration between you and just those others you allow.
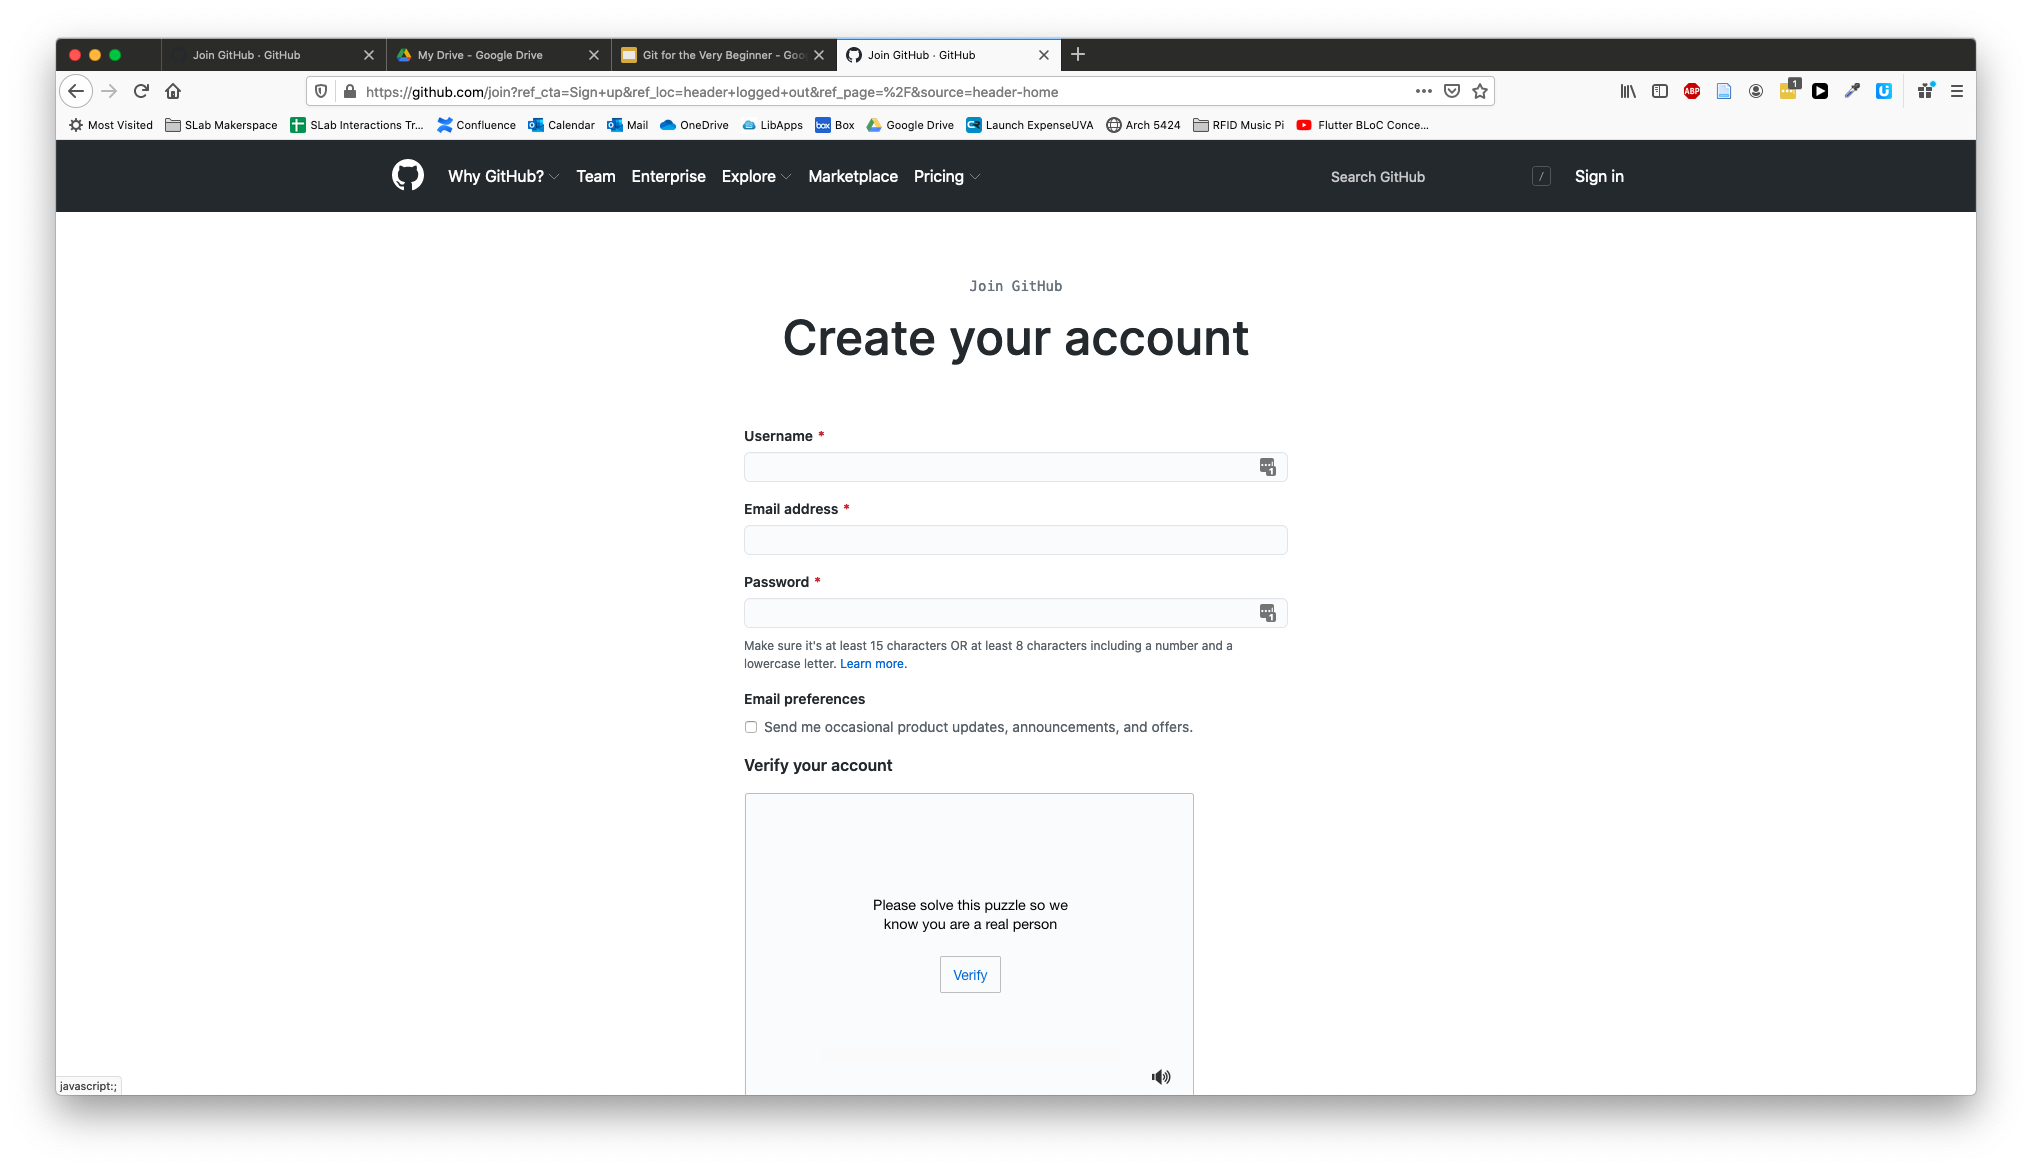
As with installing Git and VS Code, the process may change, so pull up https://github.com/ in a browser and find the button or link to “Sign Up” or create a new account. The basic steps are:
- Visit https://github.com in a browser.
- Click the Sign up button.
- Fill in the required fields for a unique username, email and password. You can uncheck the spam box – er, I mean Email preferences checkbox.
- Complete the “puzzle” by clicking the Verify button, then selecting the right images.
- Finally, click the big blue Create account button.

You will need to verify your email address before you can create a new repository. Check your email for the verify link.
GitHub is an online service that hosts your Git repositories. It can also provide a social aspect to your code. It is used by pretty much all major software companies. GitHub is not the only service out there, but it is the most well known. Others include GitLab, Bitbucket, and Sourceforge
Using GitHub adds one more step to the normal Git workflow:
- Make changes to your code (edit, add or delete files and folders)
- Stage the files and folders you want to commit
- Commit the changes
- Push the commit to GitHub
Create a repo
The next step is to create a new repository. A repository is the folder that holds the code. In our case, this is where we will put the code for building the website.

On the GitHub website, after you have logged in,
- Click on your profile icon on the top right of the page.
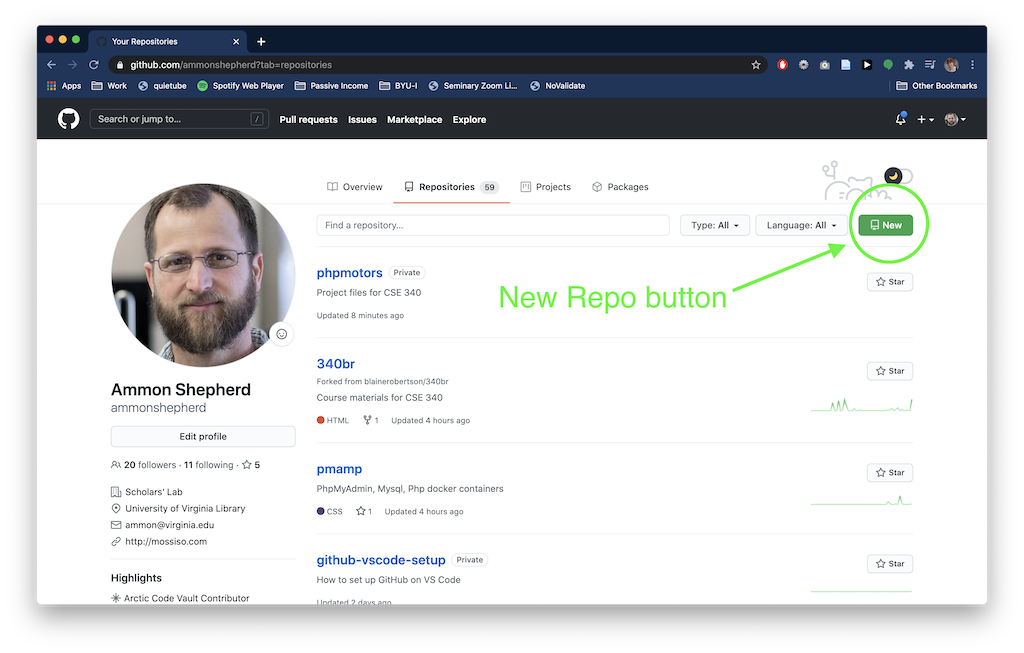
- Click the Your repositories link, then click the green New button.
- Alternatively, if you are on the profile page already, click the Repositories tab, then click the green New button.

- Alternatively, if you are on the profile page already, click the Repositories tab, then click the green New button.
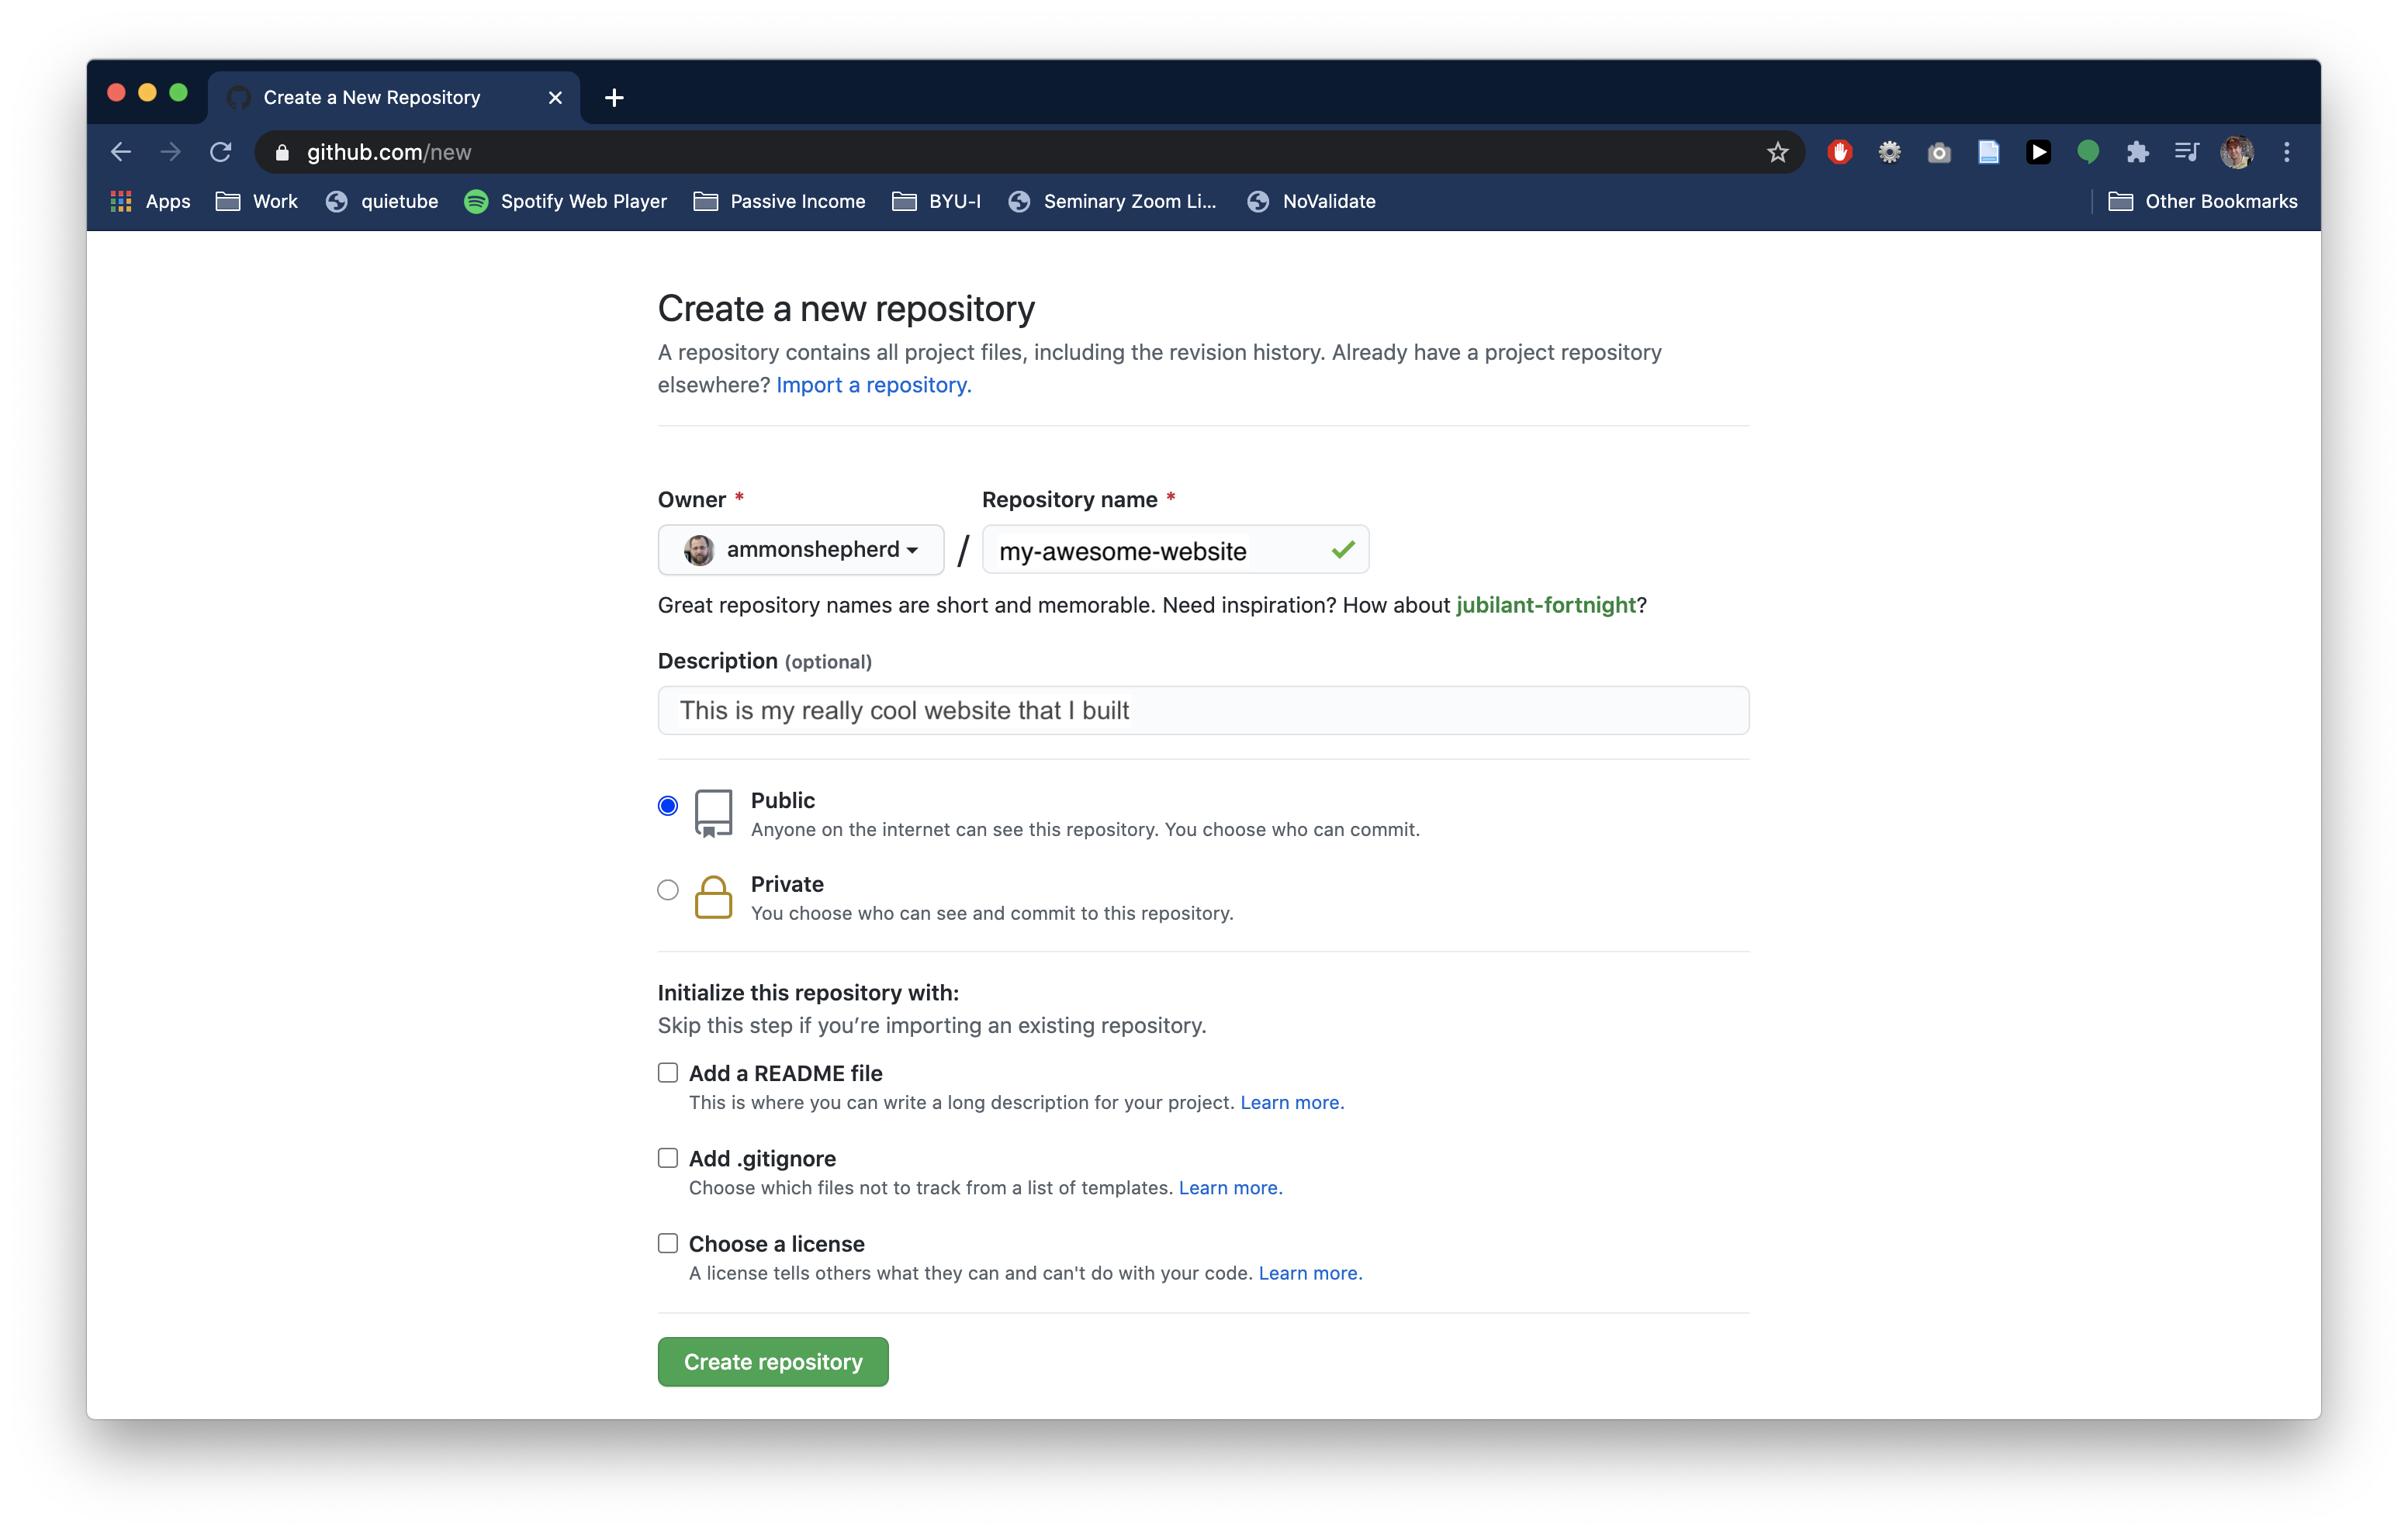
- On the New repository page, name the repository anything you like. This will be part of the URL or website address.
- Fill in a description if you like.
- Check the “Public” option. Leave the remaining checkboxes empty.
- Click the green Create repository button.

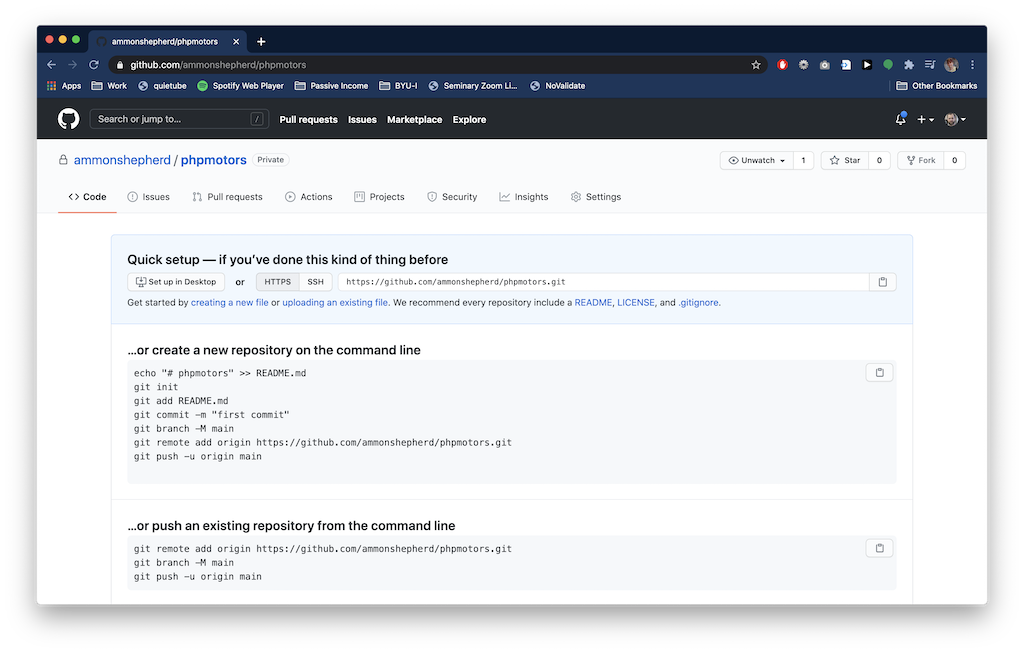
You are now taken to the repository page for the repository you just created.
