Button Servo Mover
This tutorial creates a circuit with two buttons and a servo motor.
The buttons control the servo motor by moving it clockwise or counterclockwise.
Concepts
- pull-up resistor
- buttons
- servo motor
- importing libraries
- creating objects in programming *
Circuit
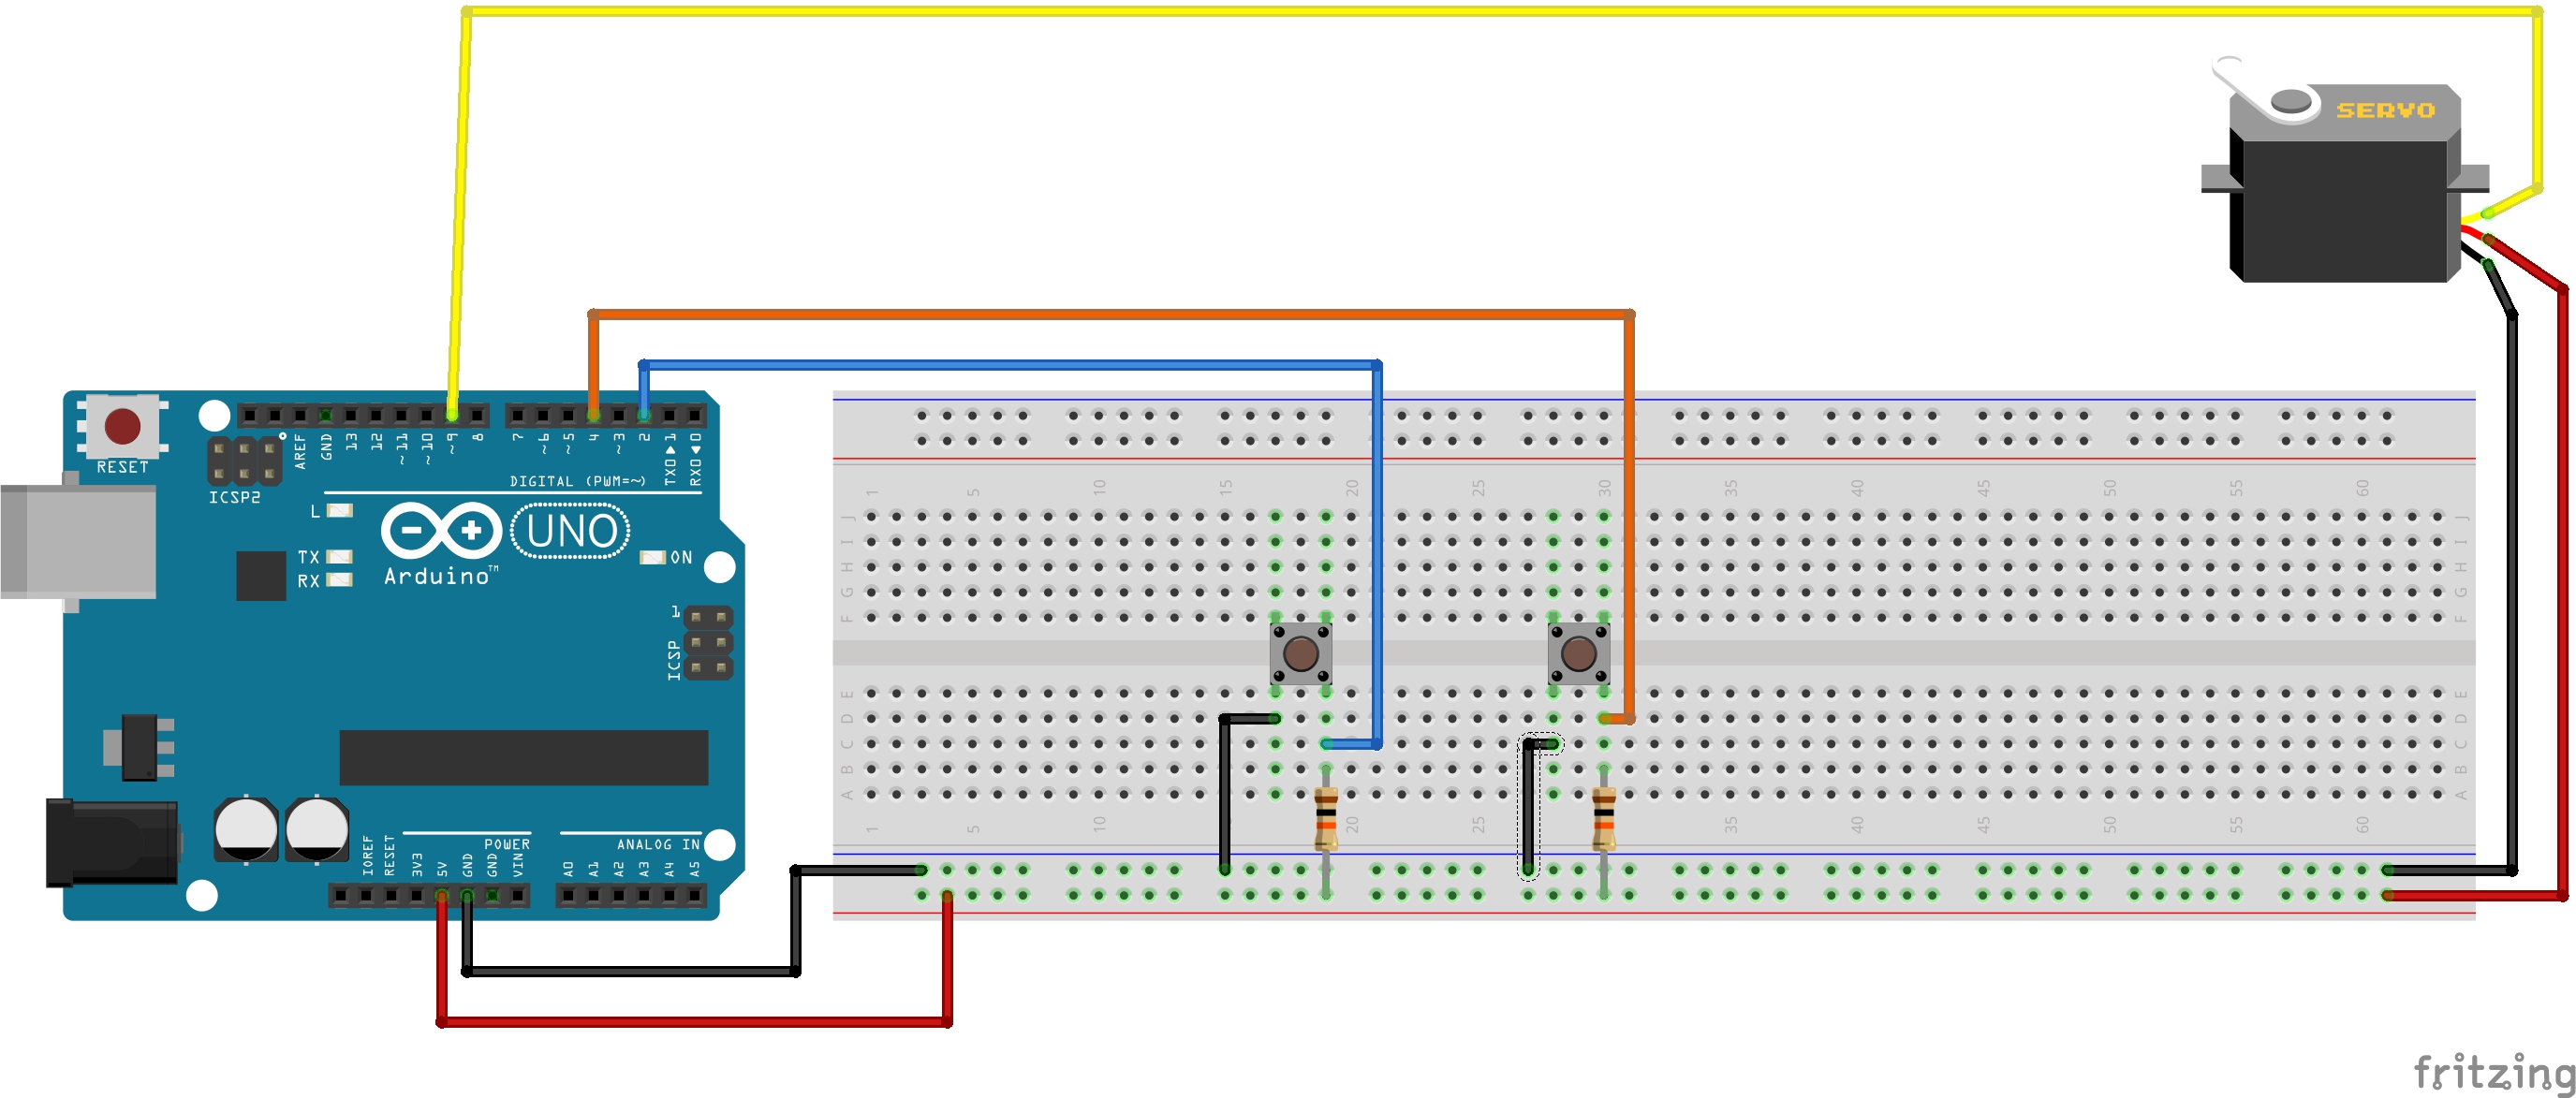
- Two buttons are connected to two pins on the Arduino.
- Right Button
- A wire is connecting the right side of the right button and is plugged into pin 4 on the Arduino
- Left Button
- A wire is connecting the left side of the left button and is plugged into pin 2 on the Arduino
- Right Button
Code
/*
    author: Ammon Shepherd
      date: 07 April 2020
     title: button-servor-mover
      desc: Use buttons to move a servo motor
   license: Creative Commons Attribution-ShareAlike 4.0
            International License
*/

#include <Servo.h>  // Include the library for operating the servo motor


const int rightButton = 4;  // Set the variable for the left button pin
int rbState;  // Create a variable for state of right button, on (LOW) or off (HIGH)


const int leftButton = 2;  // Set the variable for the left button pin
int lbState;  // Create a variable for state of left button, on (LOW) or off (HIGH)

const int servoPin = 9;  // Create the variable for the servo pin

int angle;  // Create the variable for the servo motor angle

Servo myservo;  // create servo object to control a servo

void setup() {
  myservo.attach(servoPin);  // attaches the servo on pin 9 to the servo object
  pinMode(leftButton, INPUT);  // listen for data on the left button pin
  pinMode(rightButton, INPUT);  // listen for data on the right button pin
}

void loop() {
  rbState = digitalRead(rightButton);  // get the current state of the button
  lbState = digitalRead(leftButton); // get the current state of the button
  angle = myservo.read(); // get the current angle of the servo motor

  // If the angle is between 0 and 180, then we can change it.
  // Otherwise it would go too far in either direction.
  if ( (angle > -1) && (angle < 181) ) {
    //If the left button is pushed (causing a state of LOW), move the motor 10 degree positive
    if (lbState == LOW) {
      myservo.write(angle + 10);
      delay(100);
    }

    // If the right button is pushed, move the motor 10 degrees negative
    if (rbState == LOW) {
      myservo.write(angle - 10);
      delay(100);
    }
  }

}