Processing to Arduino

The basic concept is that we are sending information from Processing, through the serial port on your computer (which the USB is connected to) to the Arduino.
The Arduino can see that data coming through the serial port, and use it in it’s own code.
This allows you to control physical objects (motors, LEDs, speakers, etc) with a graphical interface created in Processing. For example:
- clicking a button on the screen (Processing) can turn on/off an LED (Arduino)
- moving the mouse across the screen (Processing) can control the speed of a fan (Arduino)
- picking colored circles (Processing) can change the color of an RGB LED (Arduino)
Basic Processing Code
import processing.serial.*;

Serial myPort;

void setup() {
  size(200, 200);
  myPort = new Serial(this, Serial.list()[3], 9600);
}

void draw() {
  if (mousePressed == true) {
    myPort.write('1');
    println("1");
  } else {
    myPort.write('0');
  }
}
This code is very simple, but is explained below.
import processing.serial.*;
- First we import the Processing libraries for interacting with the serial port.
Serial myPort;
- This creates a Serial object named
myPort. Like a variable, this can be named anything you like.
void setup() {
  size(200, 200);
  myPort = new Serial(this, Serial.list()[3], 9600);
}
- In the setup() function, we can create the size of the canvas, but this is optional.
- Then we fill the new Serial object with data.
thisis a programming trick for an object to refer to itself.Serial.list()[1]calls the list method from the Serial library.- 9600 is the baud rate. It must be set to the same frequency in Processing and Arduino.
void draw() {
  if (mousePressed == true) {
    myPort.write('1');
    println("1");
  } else {
    myPort.write('0');
  }
}
- Inside the draw function we create an if..else statement to check if the
mouse was pressed. If the mouse was pressed, then
myPort.write('1')sends the string ‘1’ to the serial port and also prints 1 on the consoleprintln("1"). Otherwise, send the string ‘0’.
That’s it for Processing.
Basic Arduino Code
This works best if you have an LED hooked up to the Arduino. The Arduino does have a very small LED next to pin 13 that can be used to see if the code works, but it’s much more fun to build a circuit. :)
Basic Cicuit
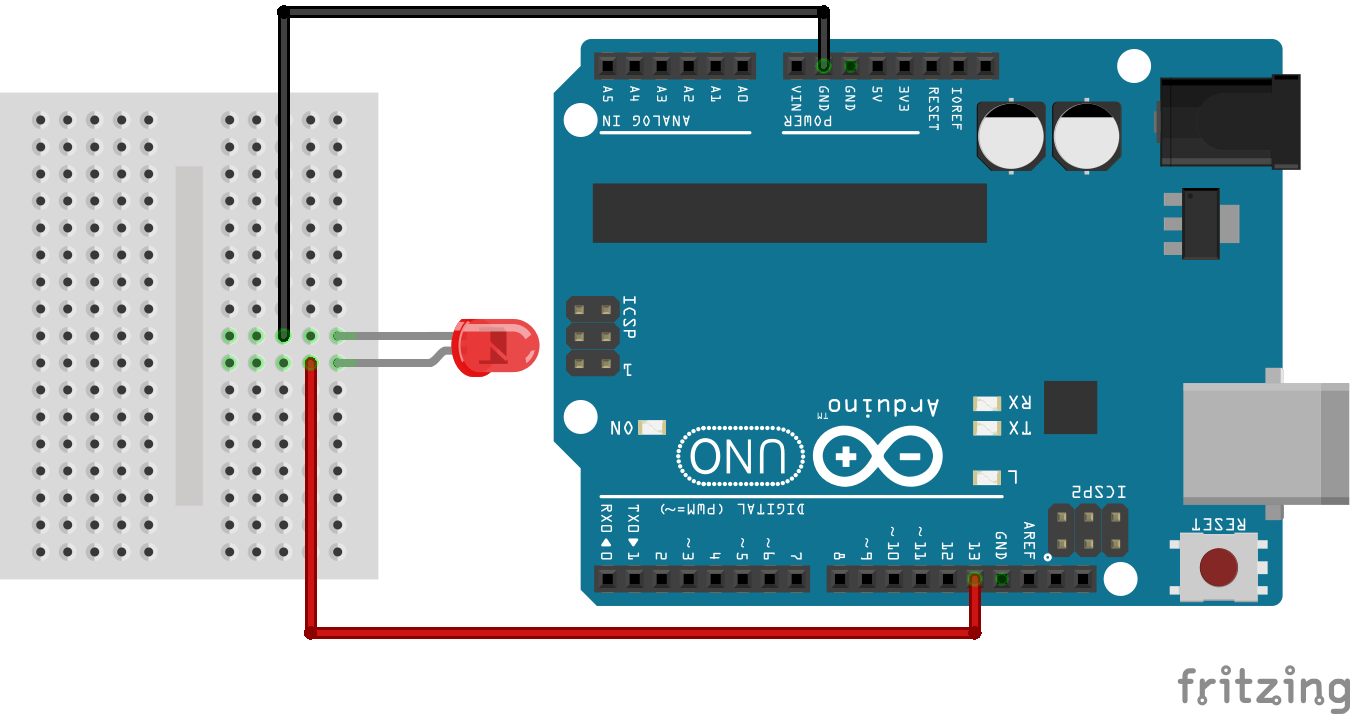
Connect the negative lead of an LED to GND on the Arduino. Then connect the positive lead of the LED to pin 13 on the Arduino.
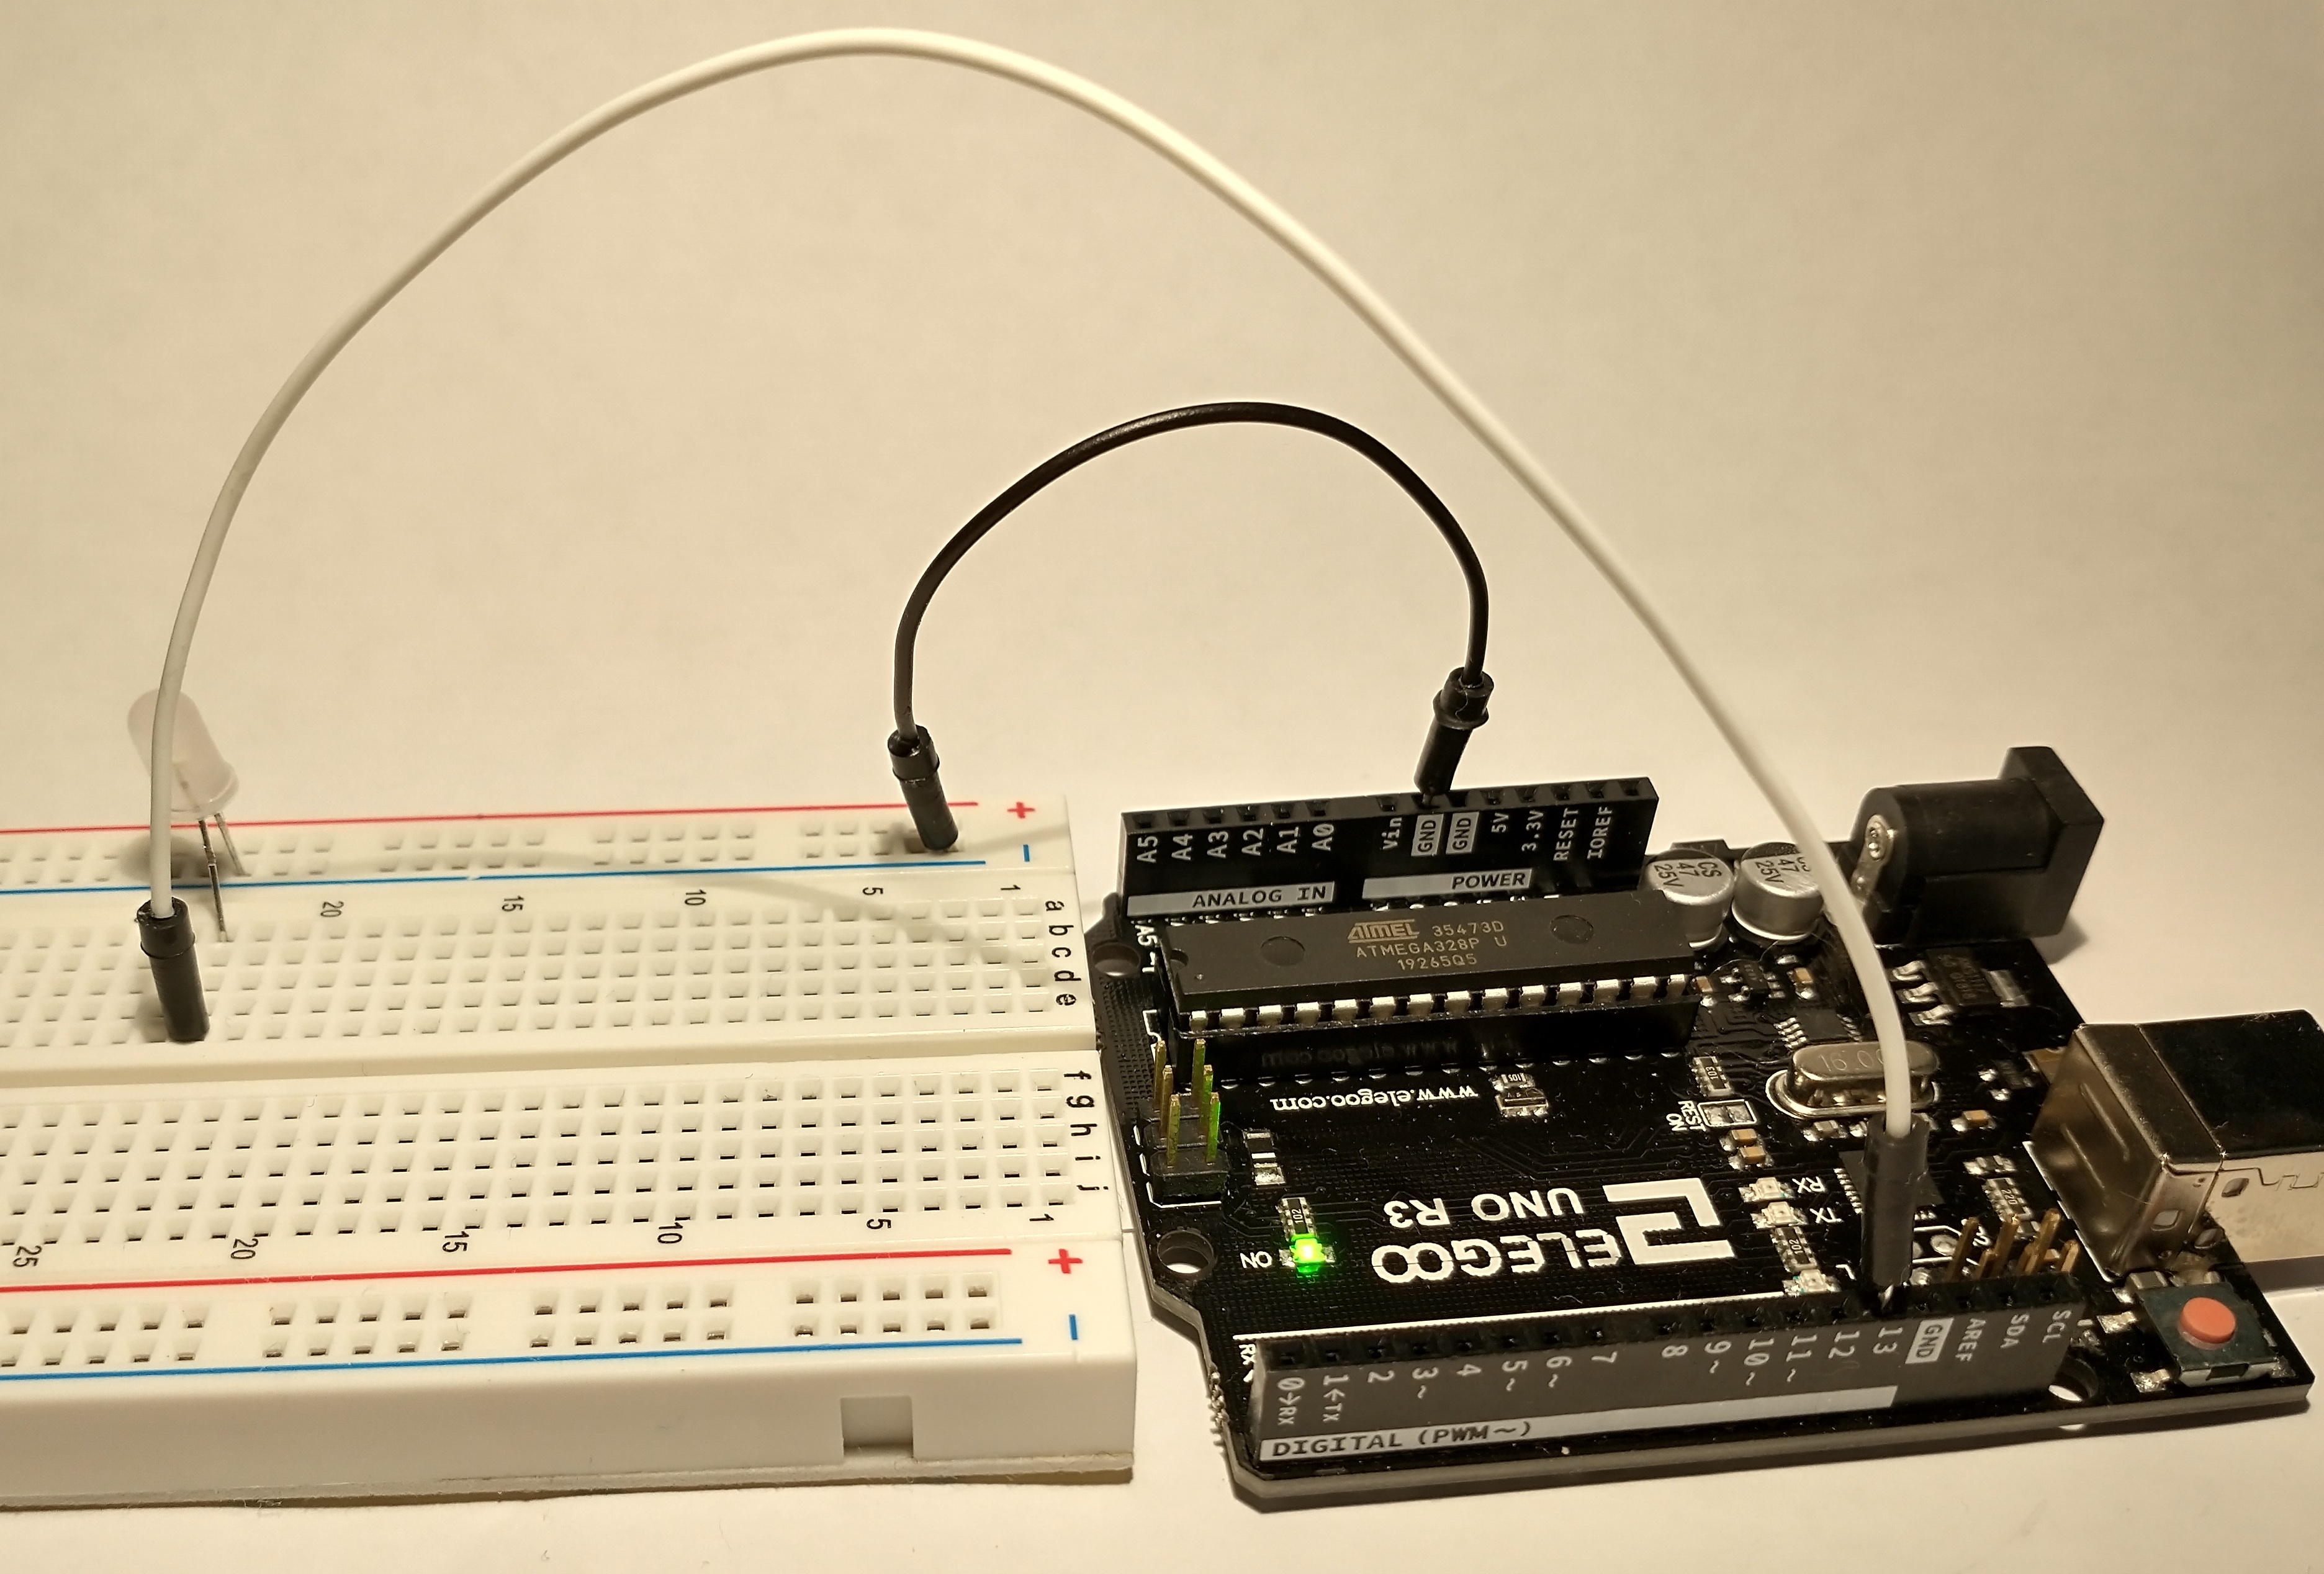
Real life circuit
Basic Code
char val;
int LED = 13;

void setup() {
  pinMode(LED, OUTPUT);
  Serial.begin(9600);
}

void loop() {
  if (Serial.available()) {
    val = Serial.read();
  }

  if (val == '1') {
    digitalWrite(LED, HIGH);
  } else {
    digitalWrite(LED, LOW);
  }

  delay(10);
  }
This code will listen on the serial port and capture any data and store it in a
variable named val. If the value of that variable is the string ‘1’, then it
will supply current to pin 13, otherwise it removes current from pin 13.
char val;
int LED = 13;
- These lines instantiate a variable named
valof type character (a string in Arduino code). Then it creates an integer variable namedLEDand assigns the value 13. This number corresponds to the pin that the LED is physically plugged into on the Arduino board.
void setup() {
  pinMode(LED, OUTPUT);
  Serial.begin(9600);
}
- In the setup() function, we set pin 13 to be OUTPUT.
- And then begin the Serial capabilities on baud rate 9600. This number must match the rate specified in the Processing code.
  if (Serial.available()) {
    val = Serial.read();
  }
- This if condition tests if the Serial capabilities are available. The
Serial.available()will return TRUE or FALSE. If it is true, then the next line of code will execute. - If the condition is true,
Serial.read()grabs the content that was sent over the Serial port and stores the value in the variable namedvalthat we created at the to of the script.
  if (val == '1') {
    digitalWrite(LED, HIGH);
  } else {
    digitalWrite(LED, LOW);
  }
- This if…else statement checks the value of the
valvariable. If the value is a string of the number 1, then it executes the code to send current to pin 13,digitalWrite(LED, HIGH), otherwise it stops current to pin 13,digitalWrite(LED, LOW).
delay(10);
- This just gives the script time to pause before executing again.
Running the Sketches
First, send the code to the Arduino. Then run the Processing sketch. If you click in the window generated by processing, the LED will light up!