
Installing Docker
This tutorial assumes that you have installed Git and VS Code.
Introduction
Docker is a piece of software that creates and runs very lightweight virtual machines. A virtual machine, or VM, is basically like a second computer running on your computer. VM software lets you run, for example, Windows and Mac on the same hardware at the same time. A full virtual machine is very resource intensive (it uses a lot of RAM and CPU). Docker is software that takes advantage of breaking a virtual machine into much smaller parts. Where a virtual machine is like a full blown operating system running inside of your main operating system, Docker runs a container, or a very slimmed down version of a virtual machine that only has the basic programs needed to do the thing you want the container to do. There is no bloat of a full operating system, which means a container uses much less resources.
Docker uses the concepts of images which are prepackaged bundles of applications, and containers which are running instances of an image.
For a more in-depth, but still very high-level introduction to Docker see the video below.
We do not need to worry about exactly how Docker works for this course. We will be using Docker to turn our local computer (your laptop or desktop) into a local webhost. Instead of building and hosting the website on a live production server, we will build and host on our own computer.
Install Docker on Windows
WARNING: These steps will require you to restart your computer.
Get the Docker Desktop software for your operating system at https://www.docker.com/products/docker-desktop
Watch this video for installing Docker on Windows 10, up to the 8 minute 10 second mark.
If the above instructions did not work, you can use these instructions for installing on Windows 10 Home or other Windows version.
Install Docker on Mac
Get the Docker Desktop software for your operating system at https://www.docker.com/products/docker-desktop
Watch this video for installing Docker on Mac, up to the 1 minute 40 second mark.
Mac users with the new Apple silicon, download the correct version for Docker from here: https://docs.docker.com/desktop/mac/apple-silicon/
Running Docker
Docker is a program that runs in the background on your computer. It must be running in order for you to view your website in your browser.
Docker Dashboard is a program that allows you to start the Docker program and be able to start and stop Docker containers. Containers are like very small Virtual Machines. We are using four containers to create our local development environment.
There are two ways to start Docker containers: using the terminal (command line); using Docker Dashboard.
You will start Docker using the Docker Dashboard, then use the terminal to initiate some commands and start containers. After that, you can use Docker Dashboard to start and stop the containers.
Start Docker by opening the Docker Dashboard. Make sure the bottom right corner turns green. This let's you know that the Docker program is running. It can take up to 10 minutes to turn green the very first time you start Docker Dashboard. If it does not turn green after 10 minutes, get help from your instructor.
When Docker Dashboard is running, it should look similar to the image below.

Create a Project Folder
Next we need to decide where to locate the files for this course. Create a project folder anywhere on your computer that you like. One suggestion is to create this in your Documents folder.
[This video shows the steps that are detailed below. There is no audio, yet.]
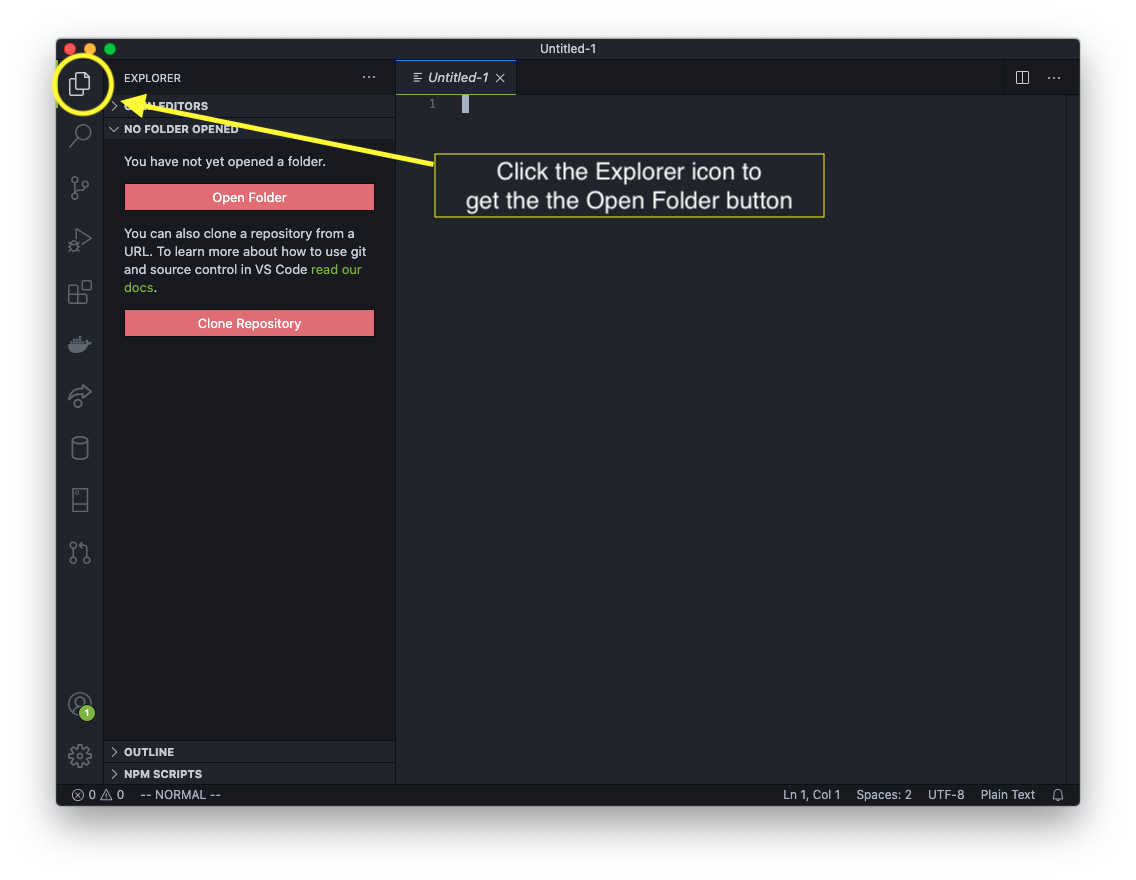
Open VS Code in a new window (File->New Window). We will now create a new folder named cse340 that will hold the Docker files and the website project files. Click on the "Explorer" icon which is in the top left corner of the VS Code window. Click the Open Folder button, browse to the path where you want your project files to reside, and create a new folder named cse340. Then click the Open button.

Click the check boxes and buttons that say you approve and trust the authors of the folder. (That's you anyways, so hopefully you trust yourself. :) )
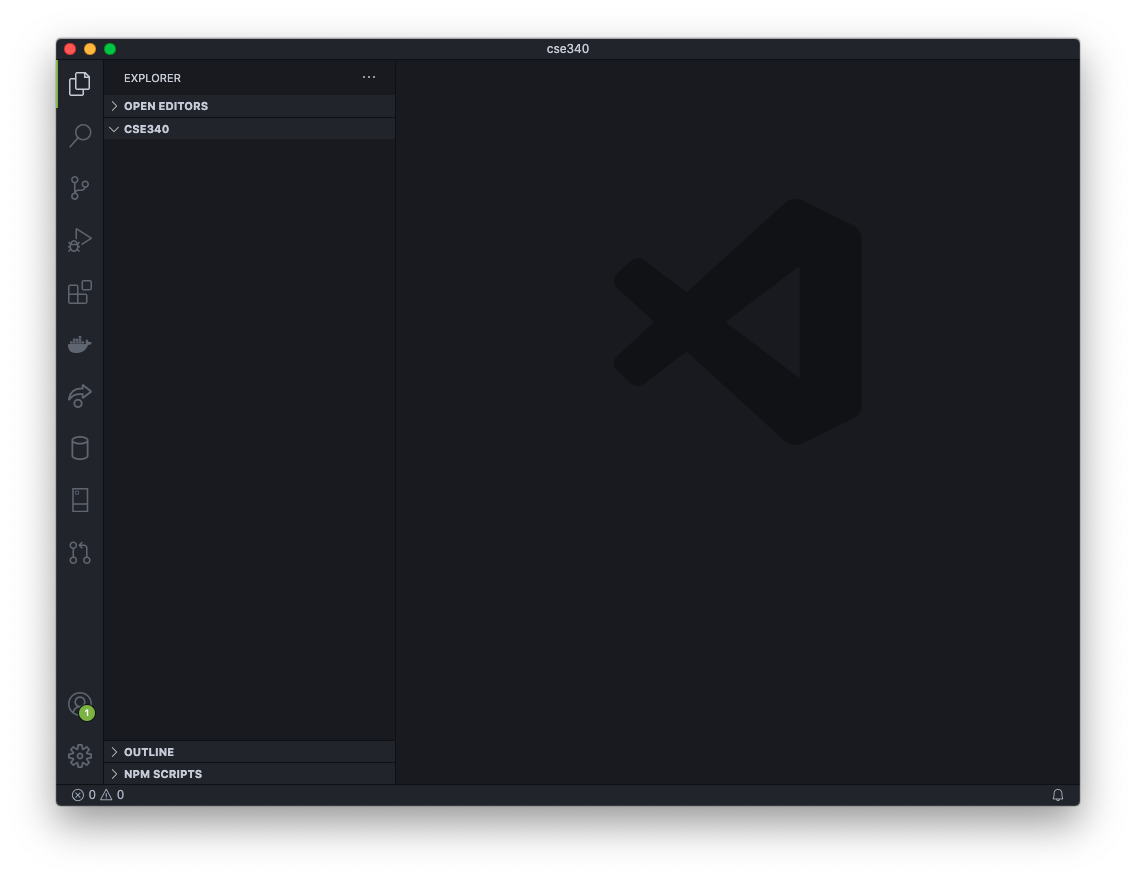
Your workspace in VS Code should now look something like this:
When you are asked to zip your project folder, the cse340 folder is the folder you will zip up, including all of the contents within.
Clone the Web Server Files
Most of your interaction with Git in this course will take place in VS Code using icons, buttons and menu items to initiate Git commands. For this step, though, we are going to use the built-in Terminal in VS Code to clone, or copy, the necessary Docker files to create the web server on your local computer.
We will use a set of images all put together nicely so all that we will need to do is run a command in the terminal to get it up and running. See the PMAMP project's GitHub page for more information.
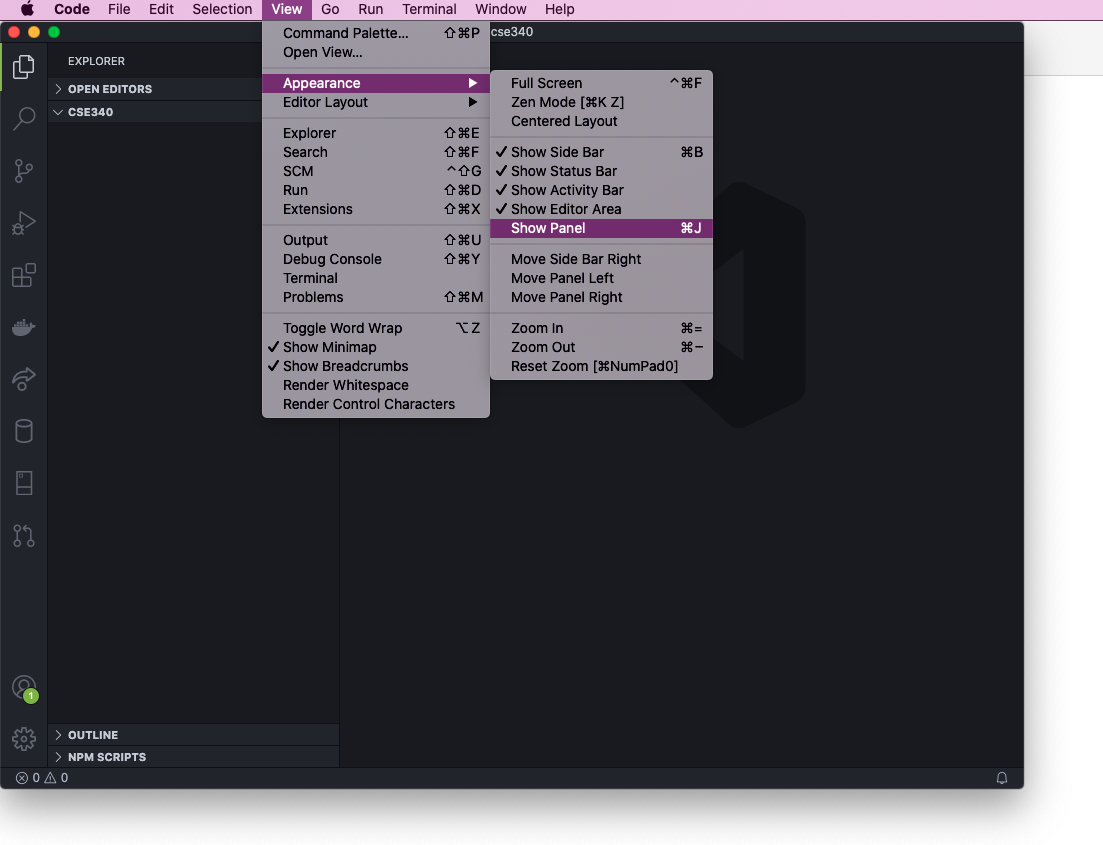
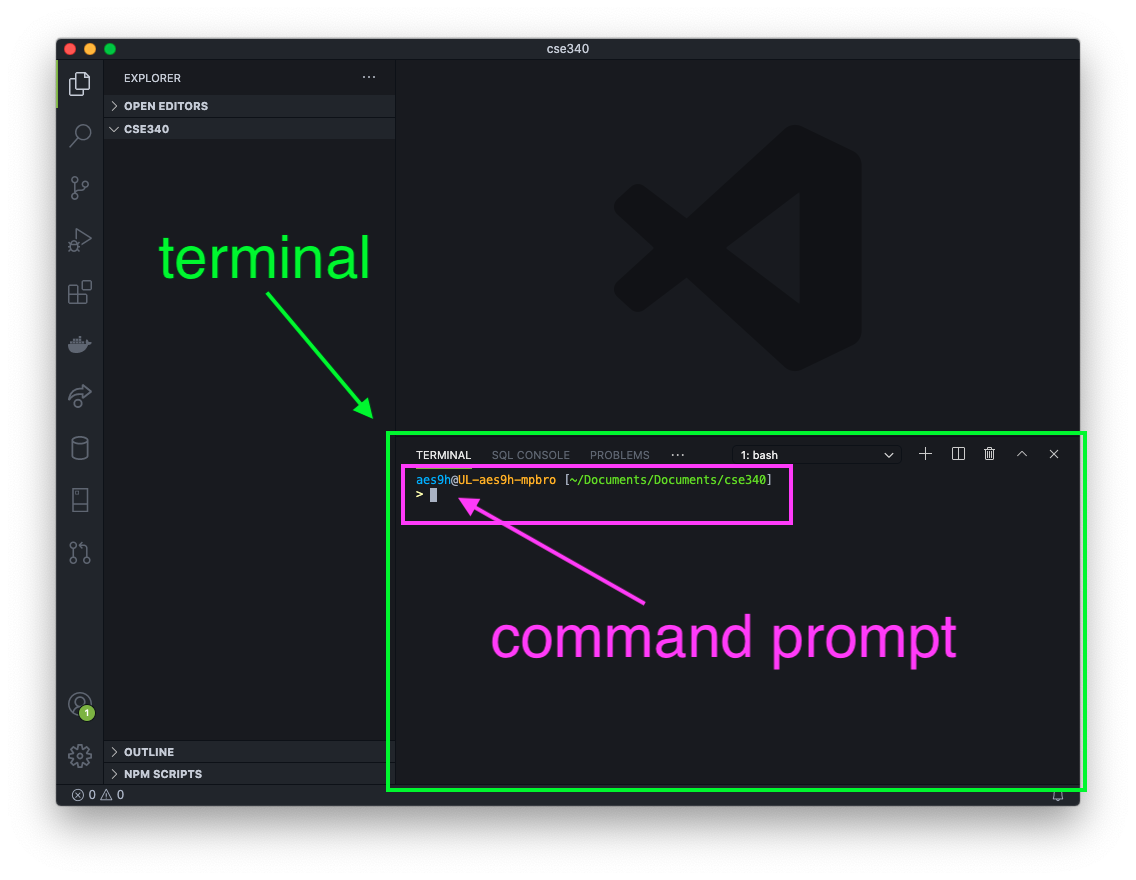
Open the Terminal by going to the Terminal menu and selecting New Terminal
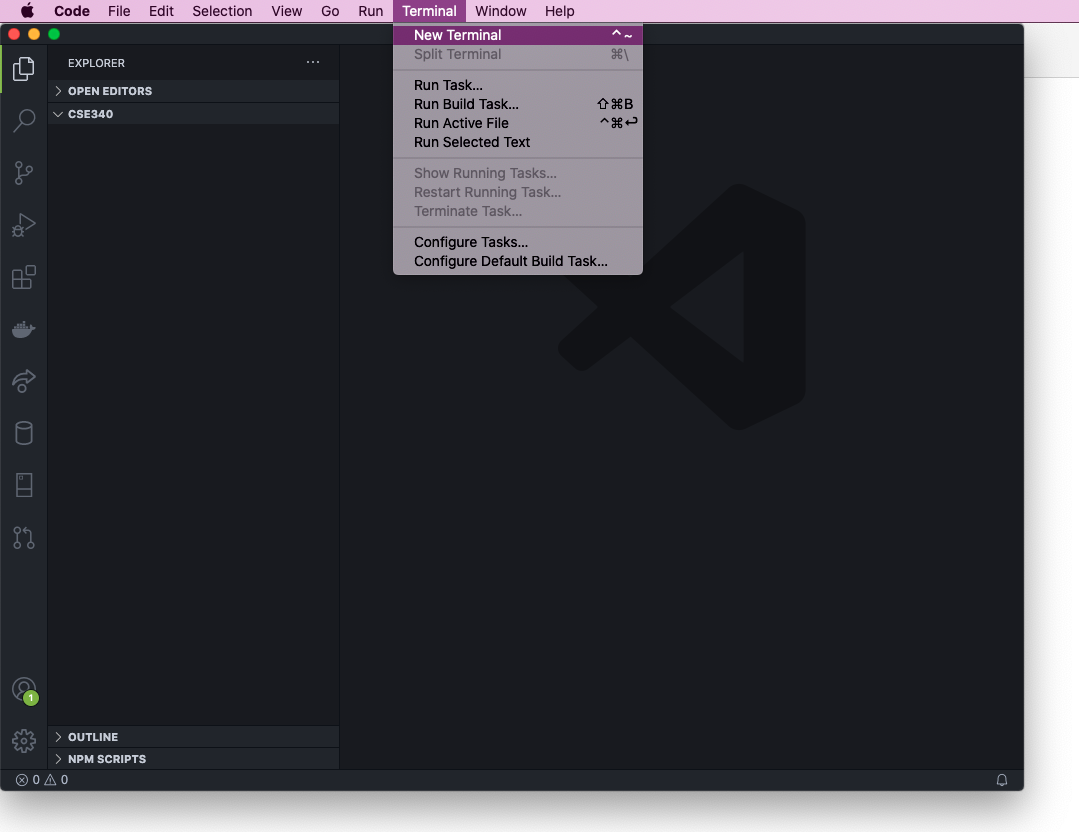
OR going to the View menu and selecting Appearance->Show Panel.
VS Code should now look similar to this. Your command prompt (the words that show up) will look different than mine.
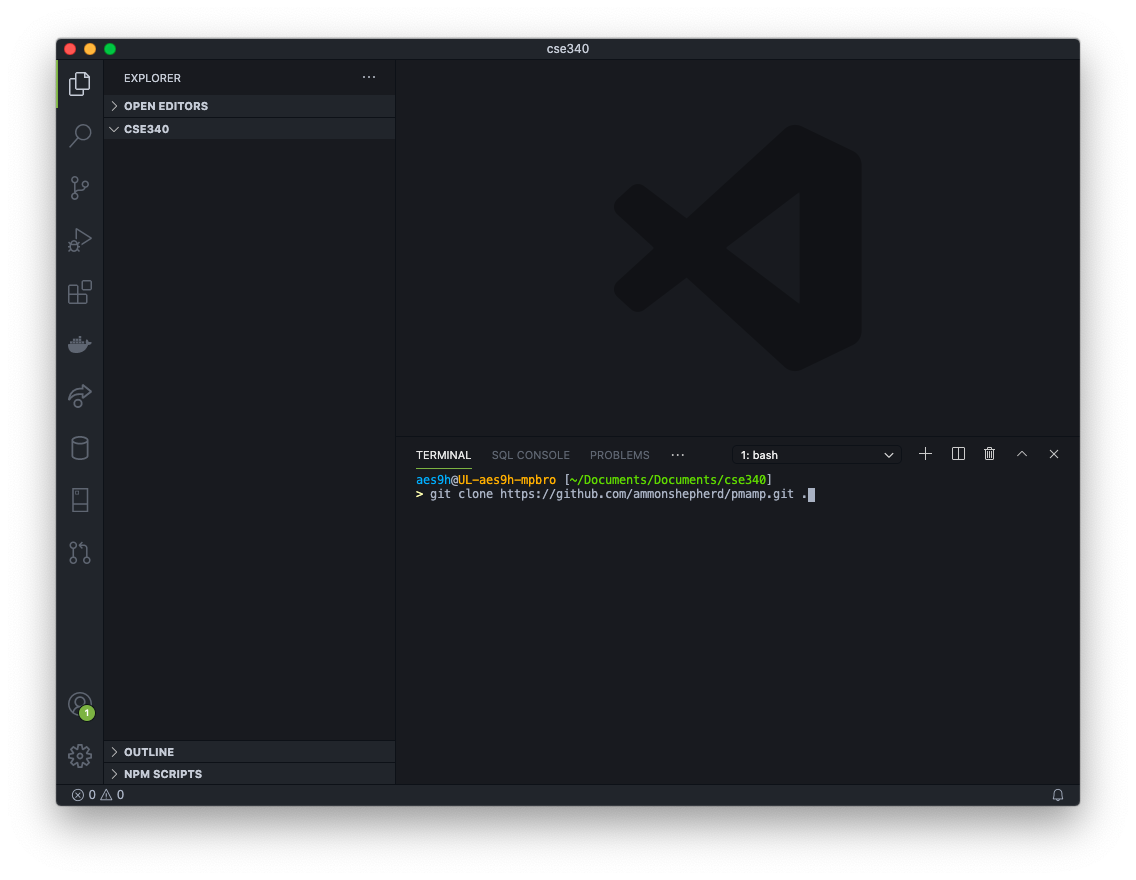
Now, we will use Git to clone the files. Type in
git clone https://github.com/ammonshepherd/pmamp.git .
then hit the Enter key on your keyboard. Notice the space and period at the end. The period means that the files will be copied into the current directory. Without the period, Git would automatically create a folder named pmamp. If a different word were used in place of the period, Git would create a folder named that word and copy the files into that folder.
After the clone command runs, your VS Code will look like this:
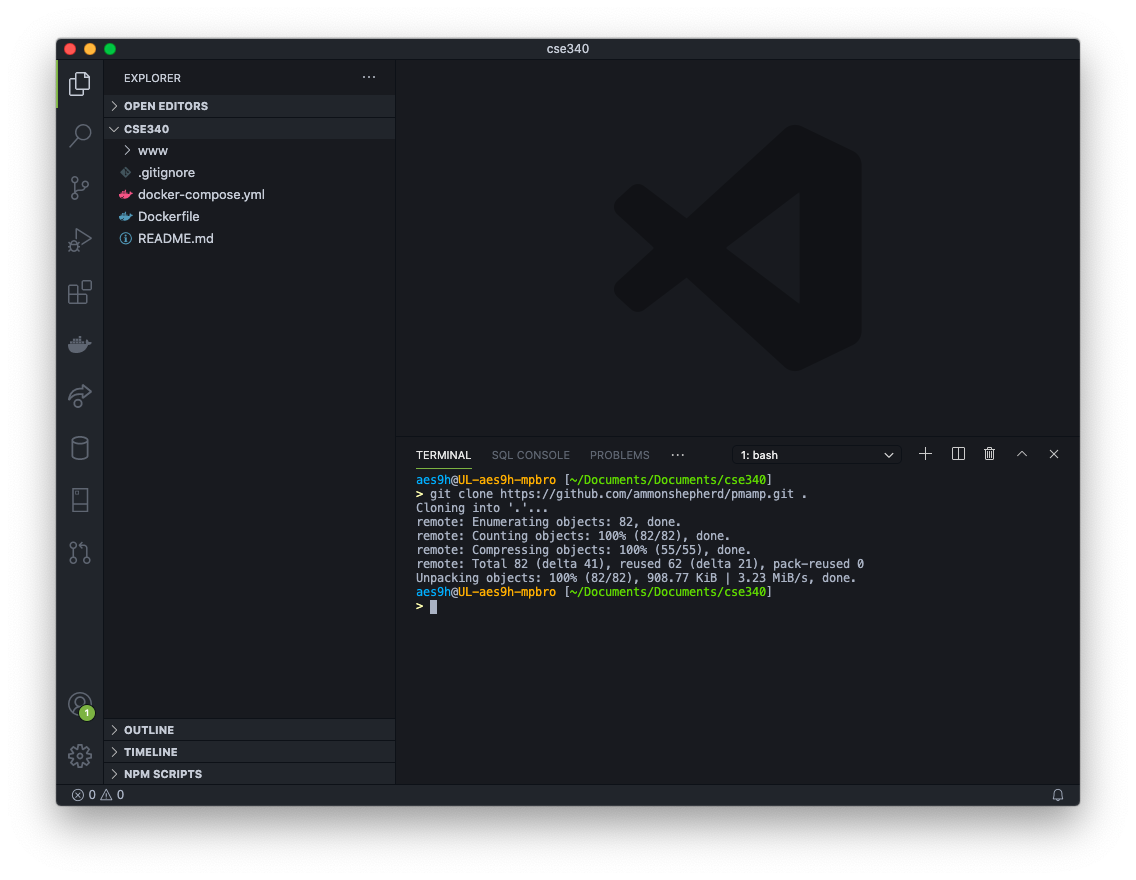
You will notice a new folder and five files. Here is what they do:
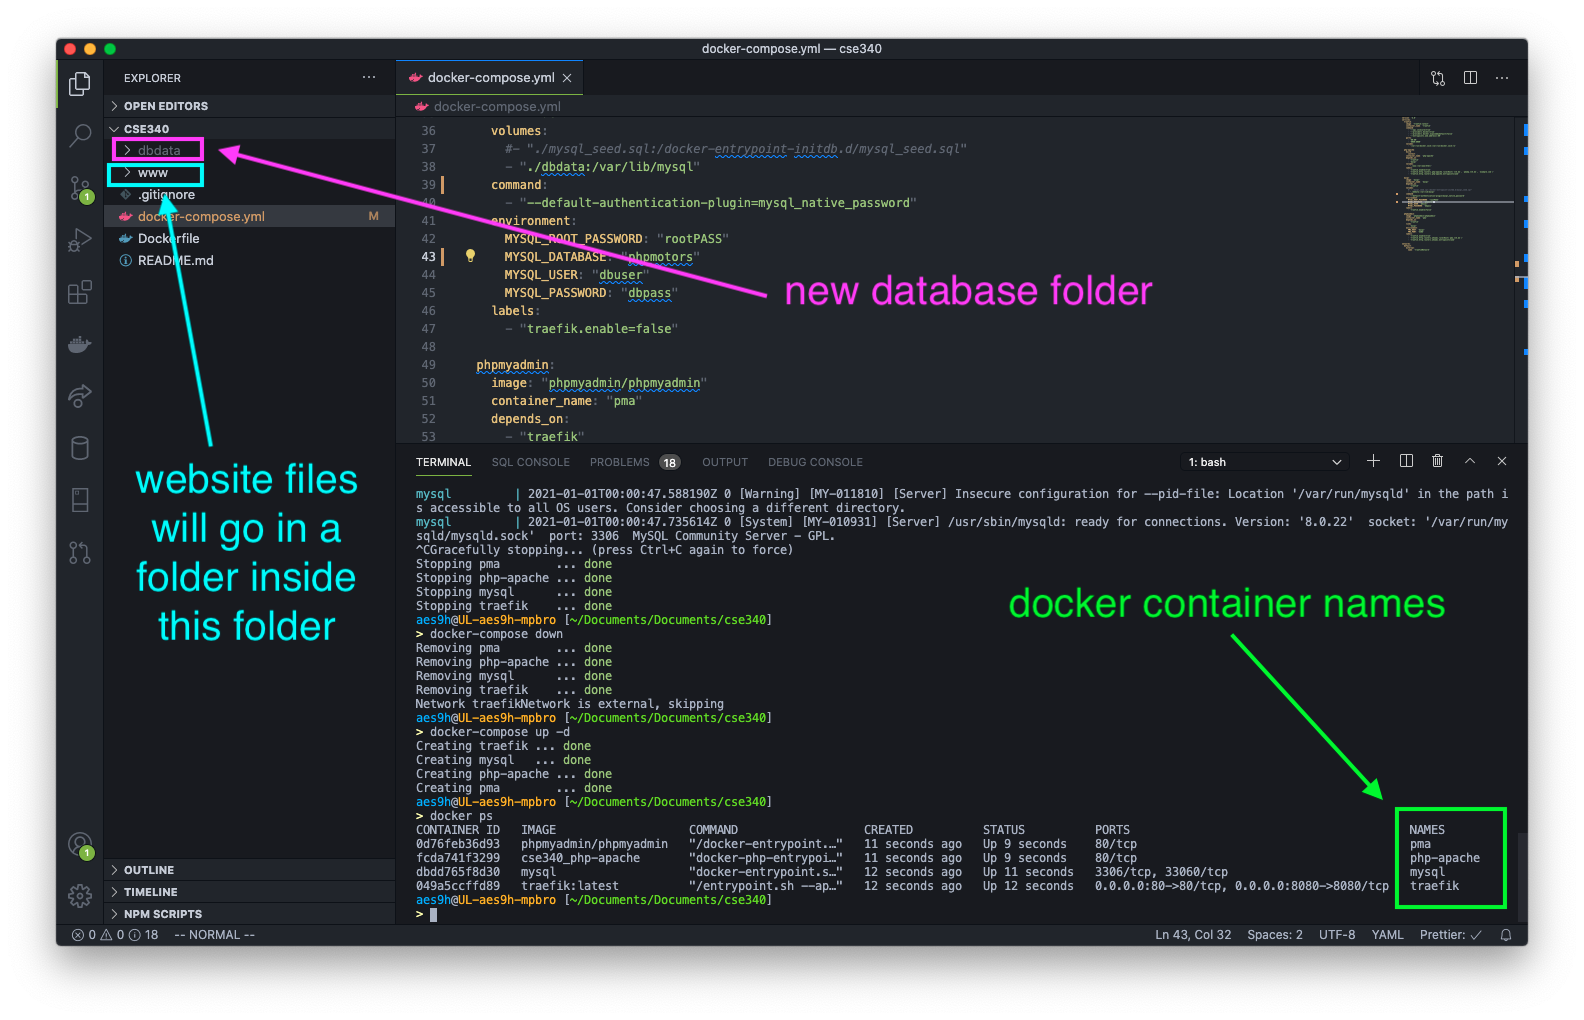
wwwfolder = This is where all of the website files will go (PHP, HTML, CSS, images, etc).gitignore= just ignore this file :) This file tells Git to ignore files and foldersdocker-compose.yml= A file to select specific images and send commands to the containers. Docker uses this file to know what images to use to turn into running containers.Dockerfile= Tells Docker how to create an image used in the docker-compose.yml fileREADME.md= Contains the text you see on the GitHub page for this repouploads.ini= Contains settings to allow PHP to upload files as large as 256MB
Run Docker
Before we run the Docker containers we need to create a Docker network. This is a special Docker-only network that allows the running containers to talk to each other. With the Docker program running (see above image of Docker Dashboard)...
In the Terminal, type in
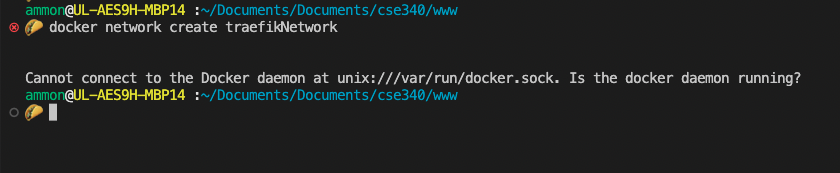
docker network create traefikNetwork
and hit Enter.

Error?
If you got an error like this, it means the Docker program was not running. Start the Docker Dashboard to get Docker running first.
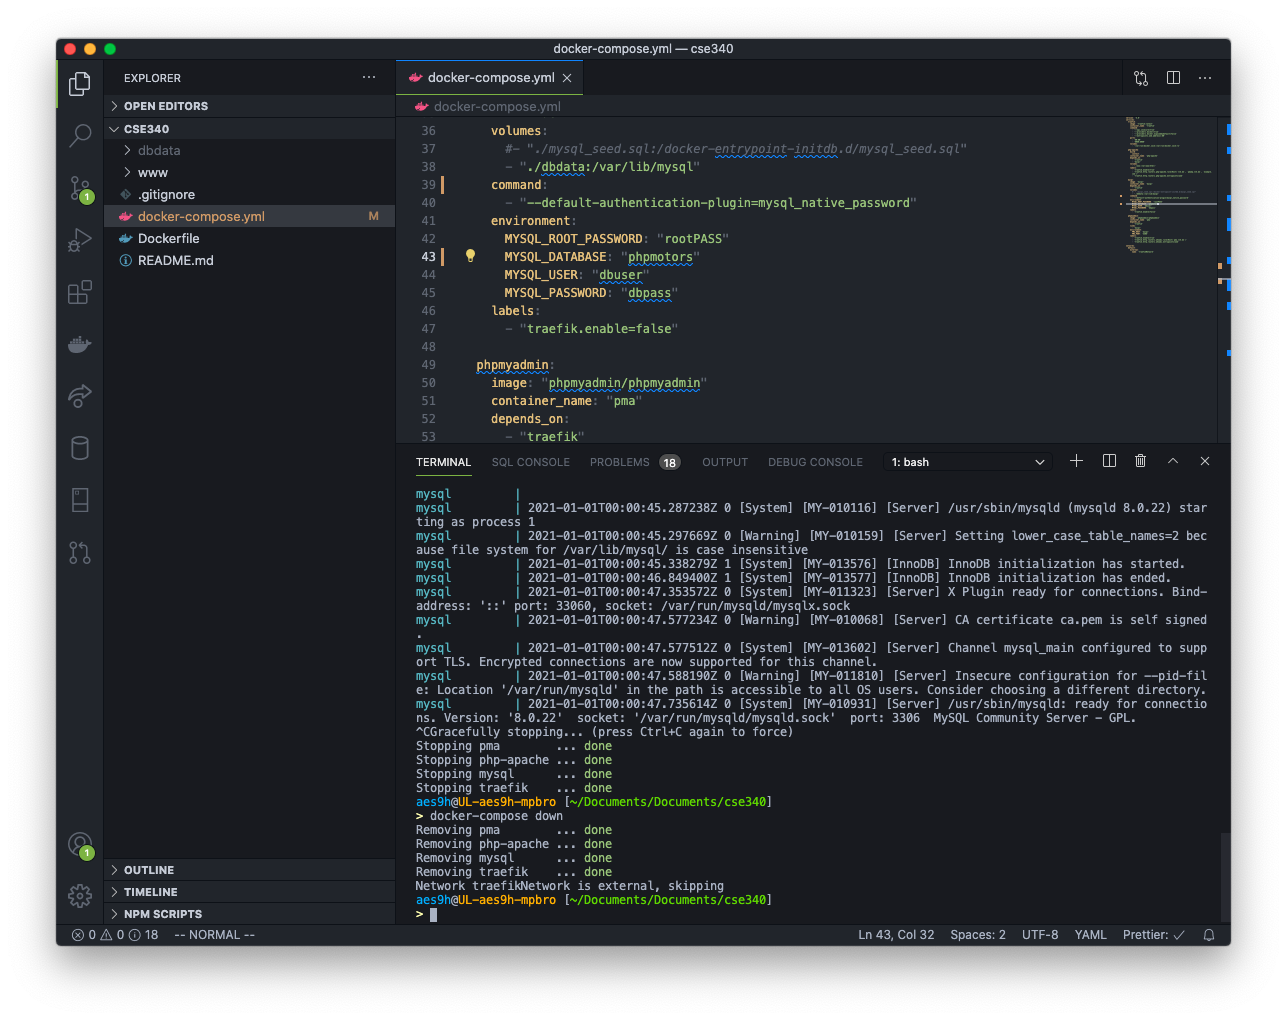
Click on the docker-compose.yml file in the VS Code sidebar so you can edit the contents.
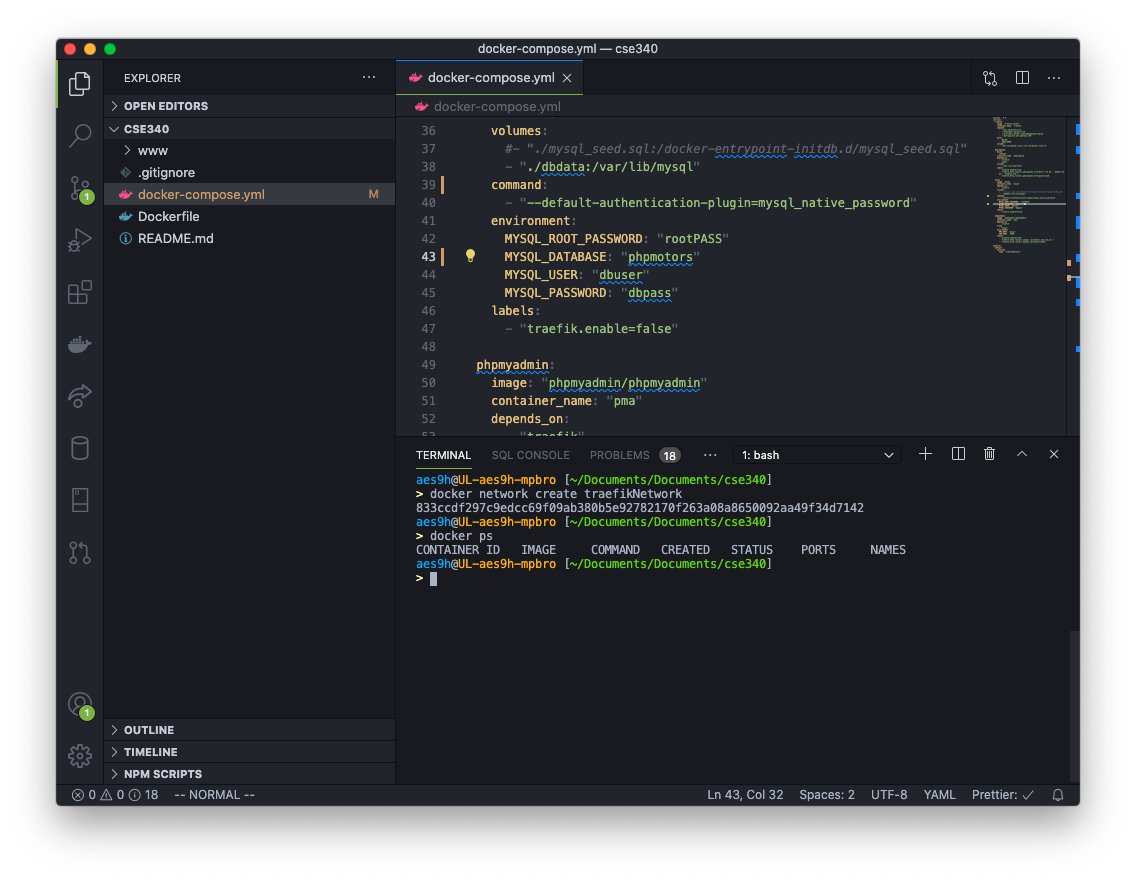
Change the name of the database on line 43 to phpmotors. Make sure to save the file!

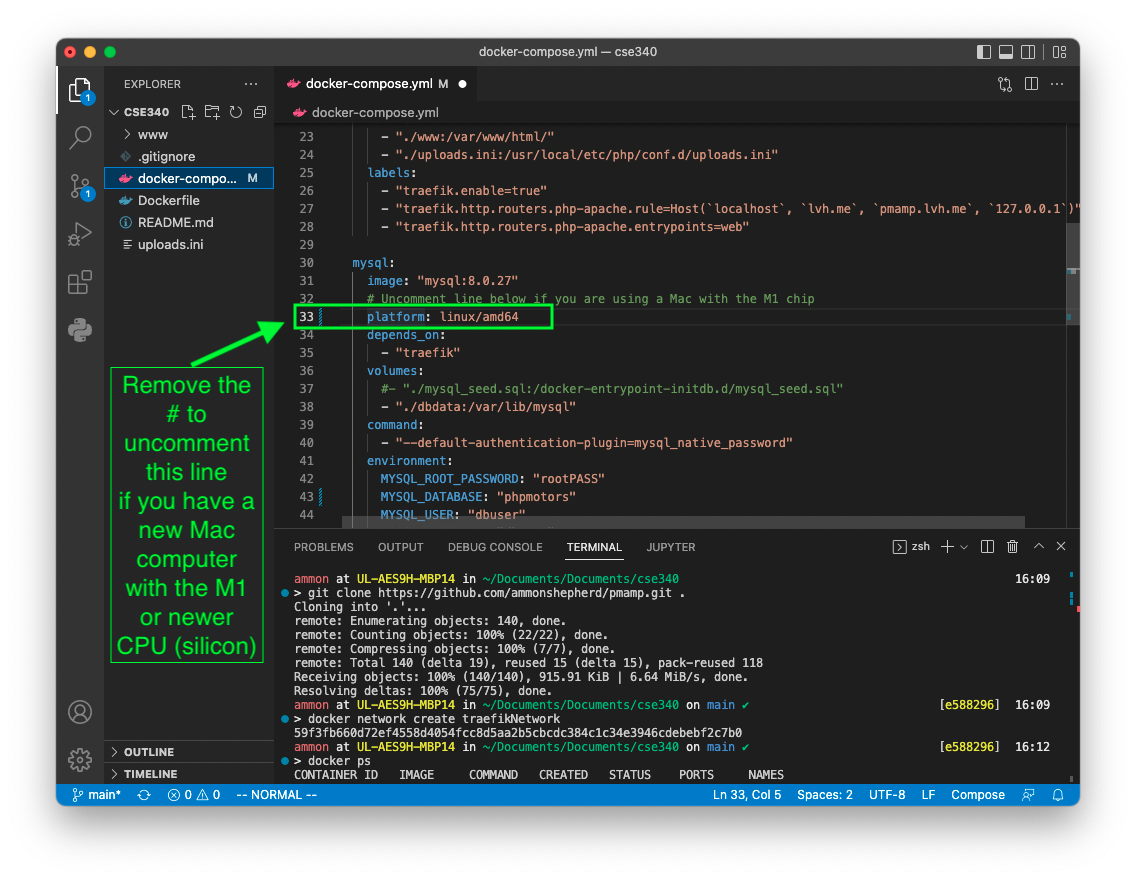
Only do this if you have a new Mac with an M1 chip or newer.
If you have a new Mac with the M1 or newer CPU, then you will also need to uncomment line #33
You will also need to run this command in the terminal (if you haven't done it already):
softwareupdate --install-rosetta
You can change the root password, username and user password if you desire, but it's not necessary for this course. In a production environment, you would want to use a more secure password and use environment variables so that the passwords are not saved in a file that will be shared.
To see what containers are currently running, type the command
docker ps
and hit Enter. It should show no containers at all.
Now type in the command
docker compose up
and hit Enter. Docker will now go through a process of downloading all of the images, applying settings, and running the containers. Notice how long it takes to get all up and running.

This setup makes use of http://lvh.me, which is a free service that seamlessly redirects the domain name lvh.me and any sub-domains back to your local computer, specifically to the local IP Address 127.0.0.1. This makes the nice trick of having your project look like it is being hosted at a real domain name. But be aware, nobody else in the world will be able to see what you see at lvh.me. If they visit that URL in their browser, the service will redirect them to their own computer which will likely result in an error message in the browser, unless they have a web server running on their computer.
Once Docker stops showing new log messages, you can go to your web browser and browse to http://lvh.me. If you see this landing page, you have a running web server!
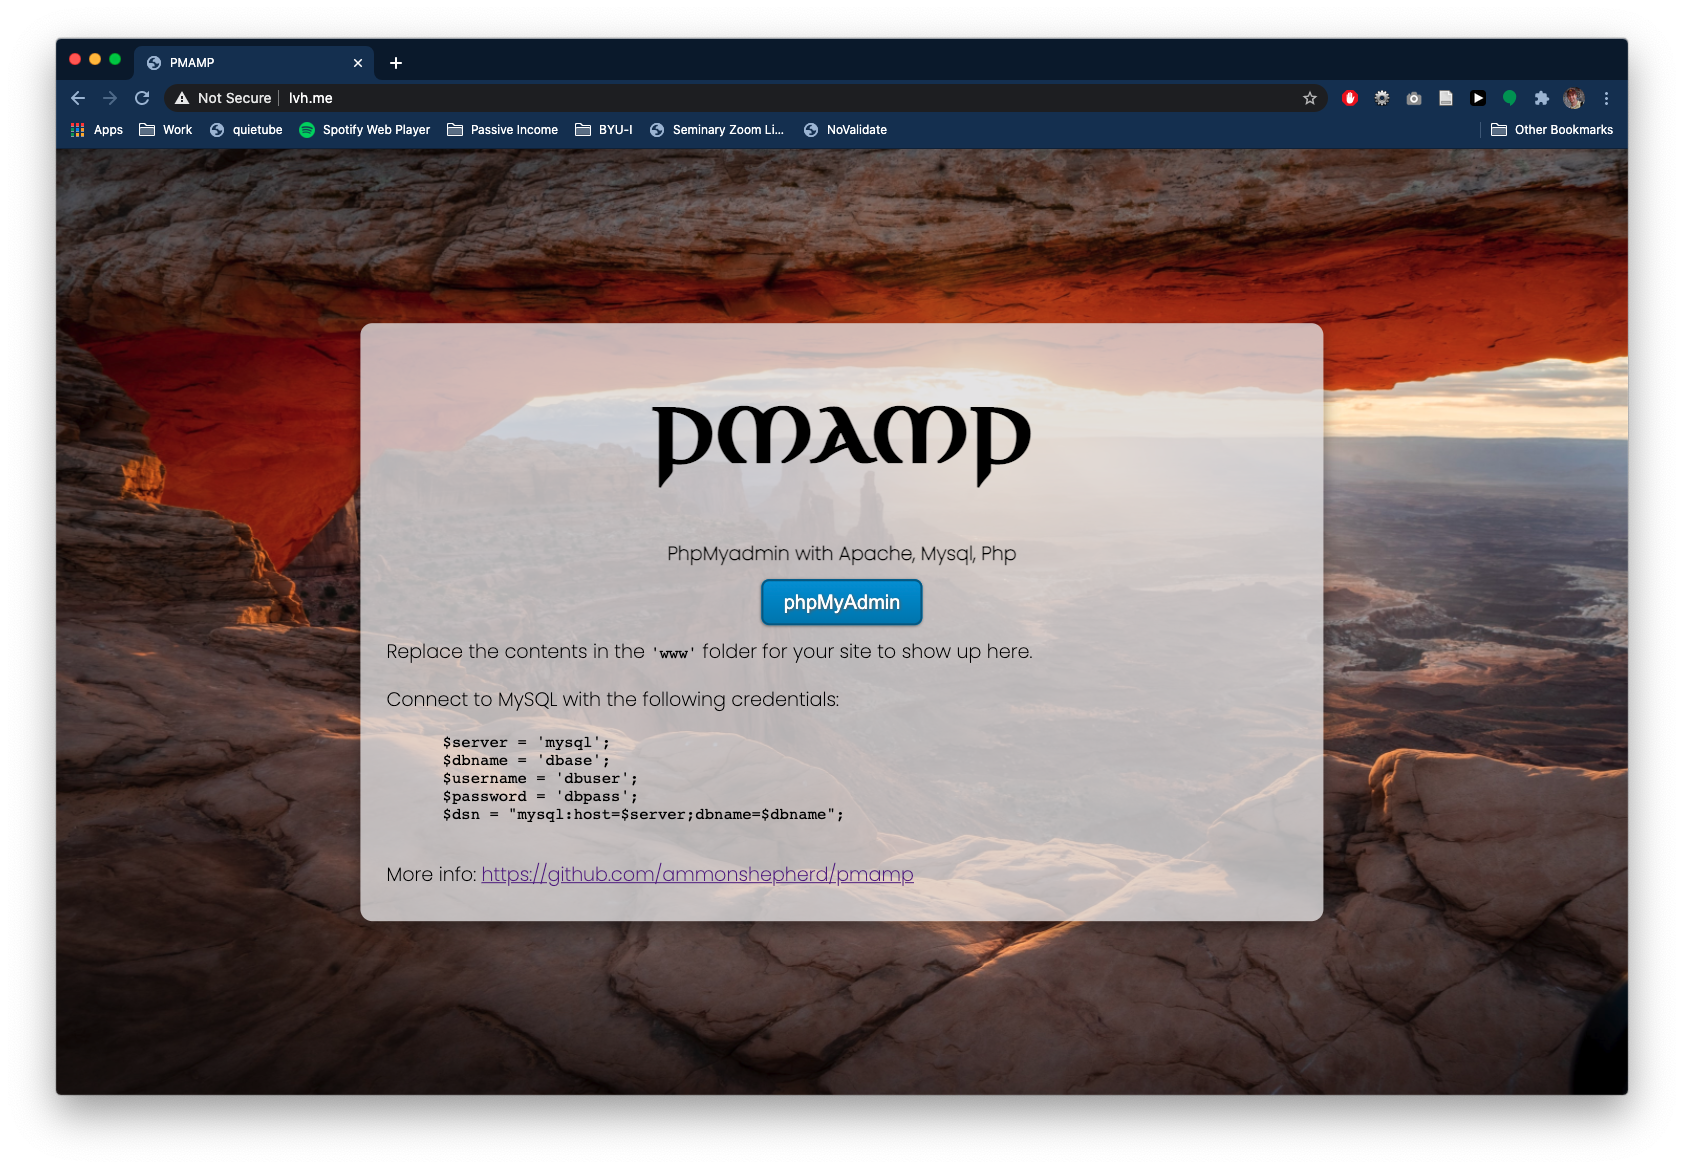
You can see if phpMyAdmin is working by visiting http://pma.lvh.me or clicking the blue button on the landing page.
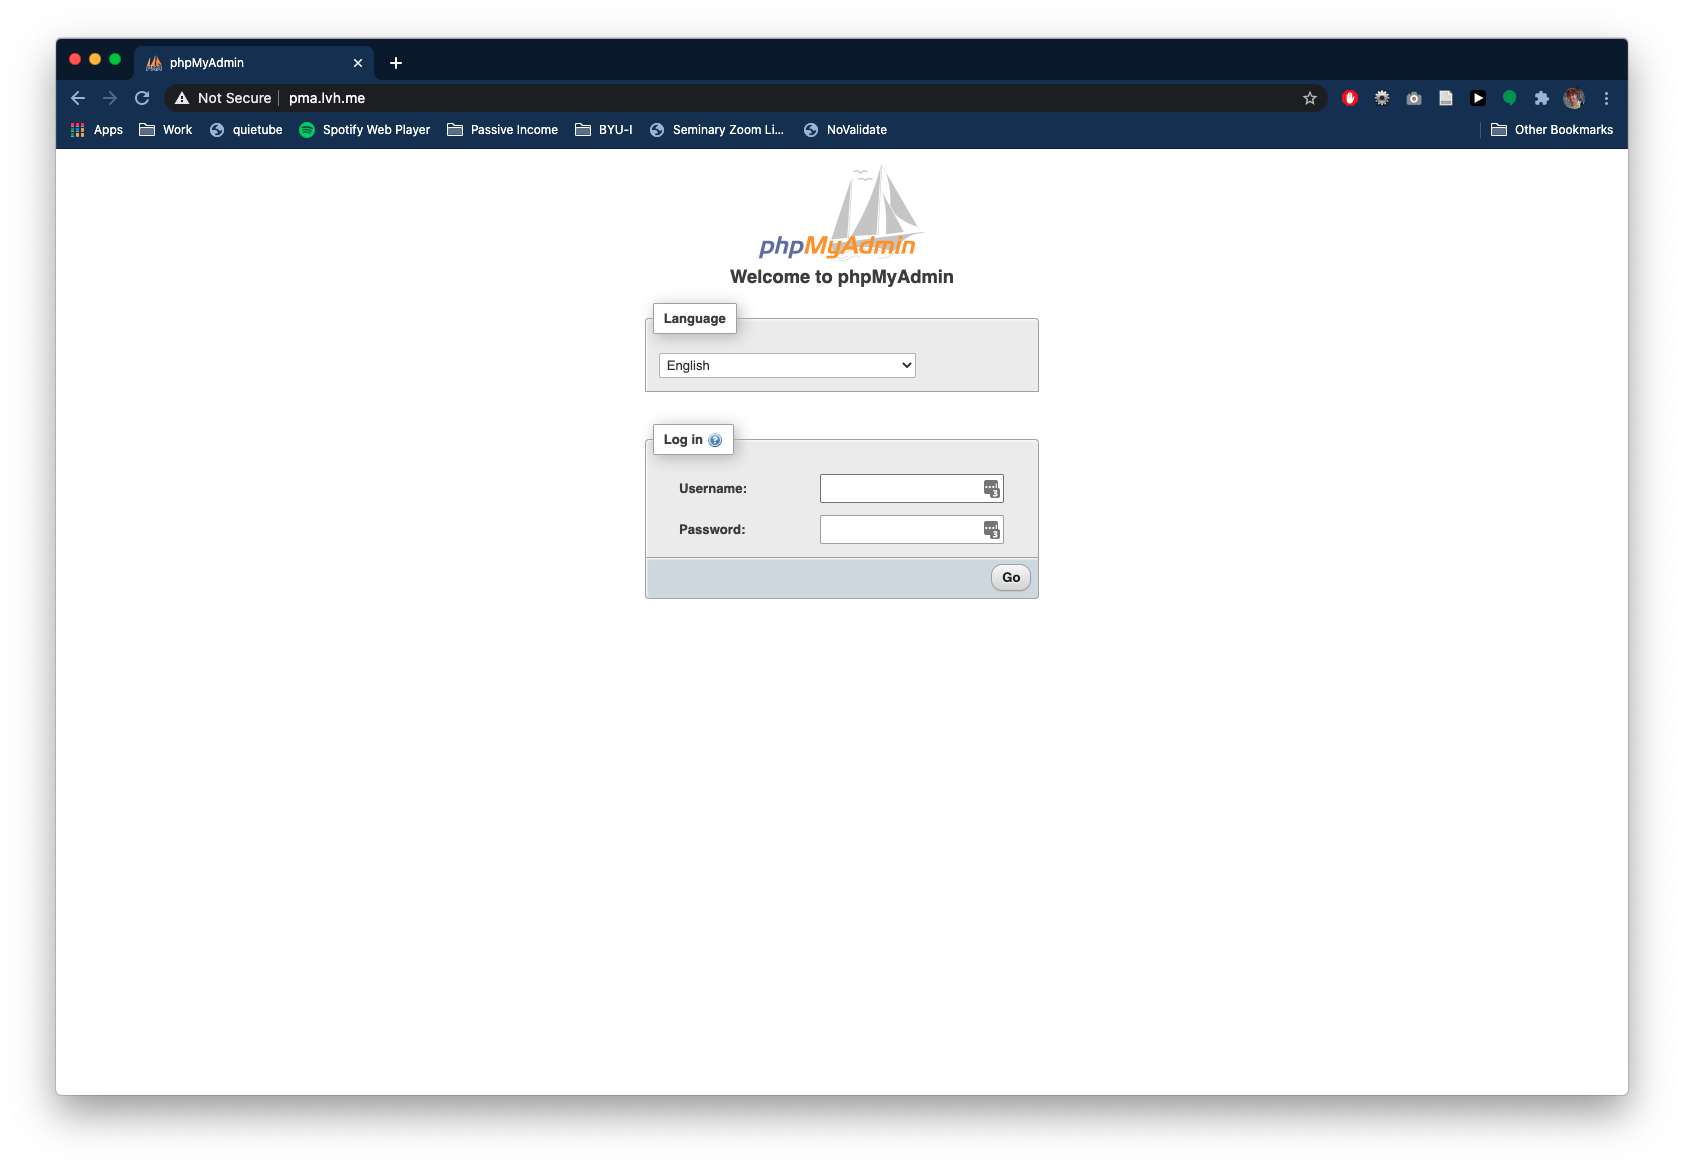
The username and password for phpMyAdmin will be the values in the docker-compose.yml file. If you did not change them, it will be
          username = dbuser
          password = dbpass
If you go back to VS Code you'll notice that the Terminal is showing the visits to the websites. We can potentially use this for debugging. We can also run these containers in the background so your terminal is not cluttered with log messages.
Stop Docker by clicking in the Terminal to select that area. Then hold down the Control key and type the C key (Ctrl-C).

This will close the Docker process. Next, run a command to ensure all the Docker containers stopped correctly. Type the following command
docker compose down
After that finishes, run the containers again using
docker compose up -d
This will run the processes in the background, freeing up the terminal for use. Also note how much quicker the process goes, as Docker does not need to download the images again.
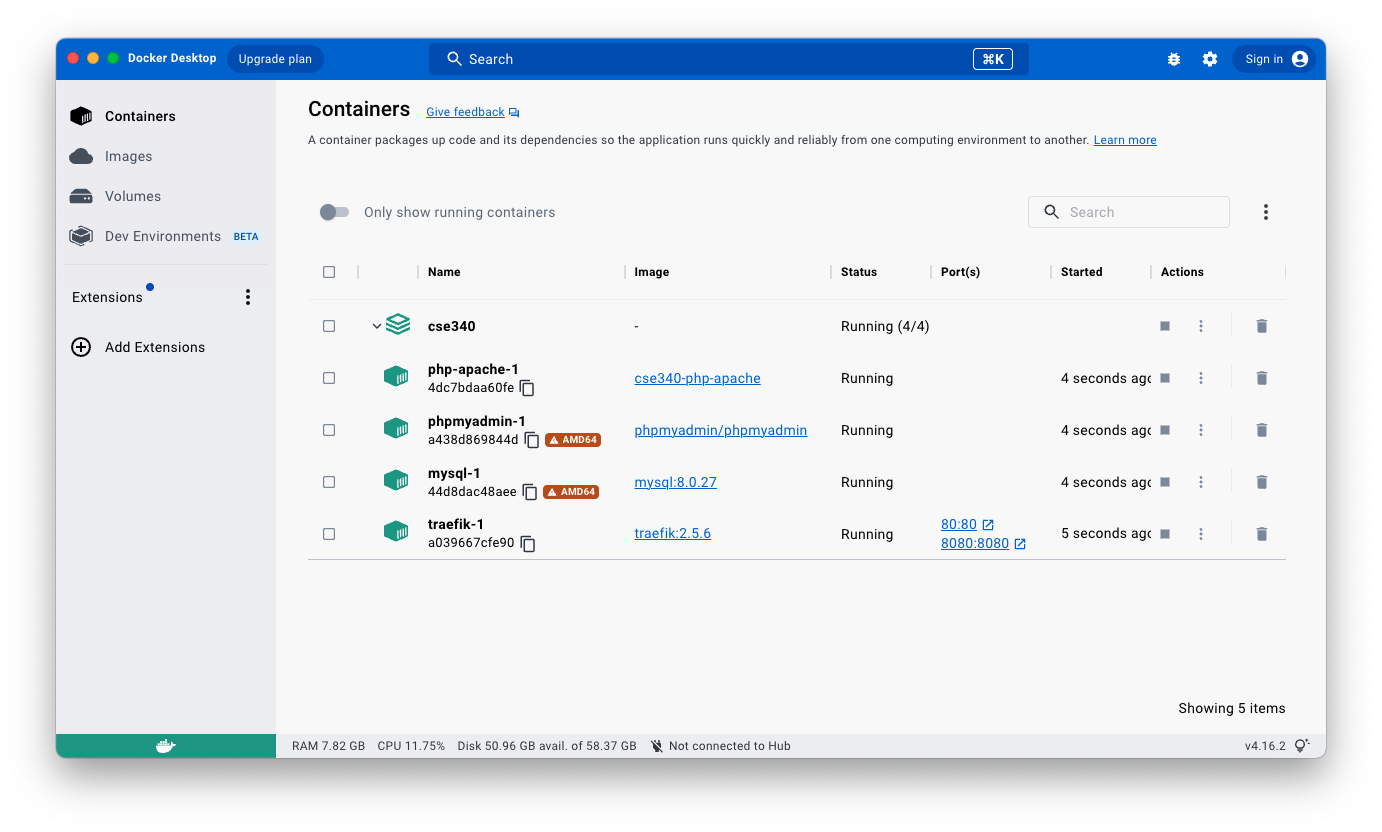
We can see the containers are running with the docker ps command.
Here we see the four containers running.
php-apacheis the container with the webserver and PHP software.pmais the phpMyAdmin contianer.mysqlis the MySQL container.traefikis a container to manage the networking and domain routing.
You can now use the terminal or Docker Dashboard to start and stop the containers.
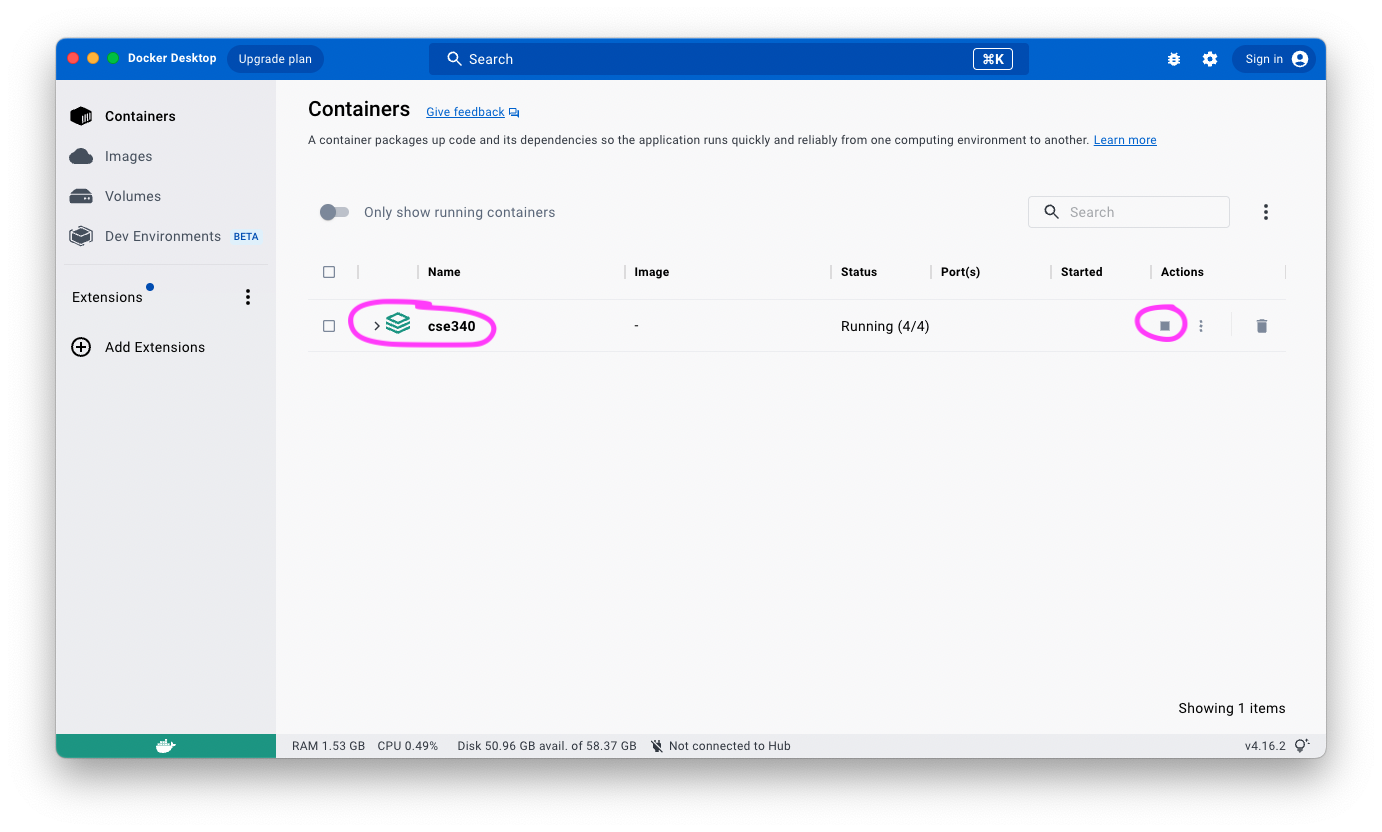
The Dashboard showing all of the running containers. Press the 'stop' button (the square) to stop the containers.
Docker Dashboard is the way to start the Docker program. The Docker program must be running in order for the containers to run.
As a reminder, all website files that we create in this course will go in a subfolder of the www folder. We will create that in a later step.
Finally, note a new folder named dbdata. This is where all of the MySQL database files are stored. Do not change any of the files in this folder.